head gasket debrief: lessons learned

p m

Administrator
Staff member
Apr 19, 2004
15,630
863
58
La Jolla, CA
www.3rj.org
i miss the good old days where i would pull a D2 into the shop at 8am for headgaskets and drive it to lunch at noon all done. heads still warm when they come off.
And this is EXACTLY how it should NOT be done.
Engine must be overnight cold or close to it for this job. Otherwise the heads WILL warp.
You can argue about it ad nauseam, but it's a matter of either being lucky (right away) and having to pull the heads 30-40k sooner for a repeat head gasket job.
 

proper4wd

Well-known member
Jun 11, 2015
77
21
boston
please. i'd like to know how you are coming to this conclusion? i imagine you will sputter something about torque values and the expansion of the metal at different temperatures but then again i would also think you'd know how stretch bolts work. who knows though so do your best, this should be interesting.
 

Tugela

Well-known member
May 21, 2007
4,762
563
Seattle
i miss the good old days where i would pull a D2 into the shop at 8am for headgaskets and drive it to lunch at noon all done. heads still warm when they come off.

Was this a routine occurrence for you? Frequency aside, doing the heads yourself at a comfortable pace has a lot of value beyond the money savings. The amount I learned about my engine in the process has helped me countless times since and I included additional work in my head gasket project that went beyond what a shop would normally do.

I get that some people don't have the time or inclination to do their own head gasket replacement, and that's fine. We all have to evaluate our individual priorities. Whether you replace your heads or pay someone else to do it, the quality of the work will reveal itself sooner or later.
 

proper4wd

Well-known member
Jun 11, 2015
77
21
boston
it was routine as can be. at least 2 per week for some time. we are talking ~12 years ago now when D2s were still covered by warranty.
 

Tugela

Well-known member
May 21, 2007
4,762
563
Seattle
I see. I am looking at this as routine from the owner's perspective where doing the job once per 70,000 - 100,000+ miles might be the norm. You are looking at this as routine from the shop tech's perspective where you are working on other peoples' vehicles. I can't speak to that situation, just my own experience working on my own Rover.
 

Tugela

Well-known member
May 21, 2007
4,762
563
Seattle
Think of it this way, Jeff - you have that much more to look forward to when the time comes for your D1 head gaskets. And help is always close at hand if things feel overwhelming.


Nick
 

p m

Administrator
Staff member
Apr 19, 2004
15,630
863
58
La Jolla, CA
www.3rj.org
This is a nice thread, and congratulations on tackling the head gasket job. I?ve only done it on my Series II-A. There?s certainly a lot more hardware on my D1?s engine :).
Head gaskets job on a D1 is really a simple and straightforward job, just time-consuming. It helps a TON to have a pair of reworked heads (resurfaced, with valve job done, new valve stem seals whatnot) at hand - then you really can start at 9am on a Saturday morning and be done in mid-afternoon.
Caveats - if you round off the head of one of the head bolts closest to the firewall or the bottom bolts of the exhaust manifolds, you life becomes much more exciting. So don't screw around with 12-point sockets on hex-head bolts.
 
  • Like
Reactions: Shiftypeak

ecaii

Active member
Feb 7, 2006
40
0
Van Nuys, CA
I'm currently right in the middle of this project on a '98 D1 with the GEMS engine. I'm at the point of removing the head bolts and pulling the heads.

Just a couple questions for all of you.

First, is the reason everyone is referencing a 5/8 socket as opposed to a 16mm because 5/8 is marginally smaller and will therefore be a tighter fit, less likely to slip and round the bolt?

Second, I'm assuming an impact socket is specified over a standard or spark plug 6 point due to less give in the metal, also making it less likely to slip and round the bolt?

Can you tell yet that I have a 16mm 6 point regular and deep well socket as well as a 5/8 spark plug socket in my tool box, but not a 5/8 impact! :p

Lastly, do any LA people have a recommendation in the Valley for a shop to resurface the heads as well as clean up the other bits?

Thanks everyone!
 

Tugela

Well-known member
May 21, 2007
4,762
563
Seattle
The consequences of stripping a head bolt - especially one near the firewall - involve headaches and delays. You have to weigh the risks and make your own decision, but you can improve your odds of doing the job correctly the first time by having the appropriate tools. For the amount of torque it takes to remove the head bolts, having a 5/8 impact socket on a breaker bar with an extender should do the trick. For the firewall bolts, add an impact swivel to the mix and get a second set of hands to apply downforce to the socket against the bolt head while you use both hands on the breaker bar. I was able to remove all my head bolts without problems using this method.

An impact socket and the swivel cost about $20 between them. You're spending a few hundred bucks on this job anyway, might as well spend a little more and reduce the chances of adding a lot of frustration.
 

bgbrox

Well-known member
Dec 25, 2016
63
8
Golden, CO
Just piling on, but you want something like this:
I think the distinction between impact/non-impact has to do with the design of the swivel joint. Impacts have a ball-and-socket design that moves more smoothly where a typical non-impact has the u-joint style that is weaker, has more play and is a little harder to control.

For me and my project, tightening the bolts against the firewall was harder than removing them. I used a sloppy breaker bar and a u-joint style 5/8 socket. Keeping the tool on the bolt was a challenge and I was very worried about it coming loose and stripping. It wasn't impossible, but I wouldn't do it that way again. I now have a set of "real" impact swivels and the difference is night and day.
 
  • Like
Reactions: Tugela

_ExpeditionMan

Well-known member
Dec 11, 2017
295
34
Texas
I followed all of the advice in this thread and was able to complete the job on my '96 successfully. The 5/8" impact socket plus impact grade swivel and a second set of hands did the trick on those tough firewall bolts. Without this combination I do not think I could have done it properly. I will also add that you should consider using an impact grade extension as well. I used a normal craftsman extension (old Sears set) and ended up putting so much torsion on it that it deformed slightly. Impact extension fixed this problem.
 
  • Like
Reactions: Tugela and bgbrox

p m

Administrator
Staff member
Apr 19, 2004
15,630
863
58
La Jolla, CA
www.3rj.org
First, is the reason everyone is referencing a 5/8 socket as opposed to a 16mm because 5/8 is marginally smaller and will therefore be a tighter fit, less likely to slip and round the bolt?

I used a Craftsman 16mm 6-point socket on a bolt that was about to get rounded off, and it went just fine. I also found a 3" extension convenient - the tall sockets don't clear rocker arm shaft, and a longer extension pokes into the firewall.
Didn't have to use any of impact-grade stuff.
 

ecaii

Active member
Feb 7, 2006
40
0
Van Nuys, CA
An impact socket and the swivel cost about $20 between them. You're spending a few hundred bucks on this job anyway, might as well spend a little more and reduce the chances of adding a lot of frustration.

Thanks for the response. I'm not worried about spending the money and I've always been a proponent of the right tool for the job. It was just since in the Atlantic British video they simply said 16mm or 5/8 socket with a breaker bar and really glossed over any potential issues or challenges with that, I was more curious to fully understand the reasoning behind the specification of a 5/8 impact in the thread. Especially on a metric car. So, thanks for confirming my suppositions as well as providing the extra tips.

I'm assuming with the firewall clearance on the rear bolt, a standard impact as opposed to a deep well is what's needed?
 

1776

Active member
Mar 14, 2019
28
4
Savannah
This is a nice thread, and congratulations on tackling the head gasket job. I’ve only done it on my Series II-A. There’s certainly a lot more hardware on my D1’s engine :).

Jeff
I miss my Series III. HG, water pump, lap and adjust valves and every fluid on it was a leisurely Saturday job.
 

ecaii

Active member
Feb 7, 2006
40
0
Van Nuys, CA
Thanks for all the input everyone. I've ended up using a combination of the options suggested and will follow up with what I found once I've wrapped everything up. Interestingly I didn't end up needed the swivel attachment, impact or otherwise. There was enough room on both of the back bolts for me to use my breaker bar with a shallow impact socket and 2 1/2 inch extension. A deep well socket would have worked as well. I stuck with that as it felt more secure than using the swivel.

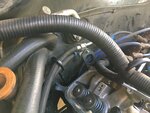
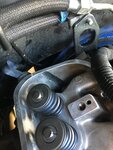
Now, reassembly question. I have the GEMS set up. On the back of the passenger side head two brackets/clips were bolted (picture attached). One is a plate that goes on with 2 bolts that have 13mm heads with a metal clip screwed onto the top of the plate. The other is a metal clip that screws on with a single bolt that has a 14 mm head. I had left them in place when the head was removed, so I didn't take pics or mark the configuration. The shop that cleaned my heads removed them though.

I'm just trying to confirm that I have them back in the proper places and then what ends up hooking into the clips?
 

Attachments

  • IMG_4283.JPG
    IMG_4283.JPG
    1.8 MB · Views: 13
  • IMG_4284.JPG
    IMG_4284.JPG
    1.6 MB · Views: 13
Last edited: