
I am an expert in power steering systems, I received a B.S. degree in power steering systems from Bovine State University. All details in this write up are accurate and should not be questioned. Any future leaks or power steering system problems you may have are your own fault and you should find someone other than myself to blame for them.
How Power Steering works: This is a very complicated topic but I will do my best to simplify it. Power Steering Fluid lives in the Power Steering Reservoir, it is then drawn into the Power Steering Pump via the suction/intake hose. Once it is in the pump it gets spin around real fast, stuff happens and it is discharged out of the pressure line at a real high pressure. From the pressure line it travels into the Power Steering Box. Inside the box the fluid gets moved around to different areas, lights flash, magic happens, and music plays. A good while after last call the fluid stumbles out of the Power Steering box and into the low pressure line. This low pressure line is also the return line that carries the fluid back to the Reservoir. When the fluid gets back into the reservoir it gets swirled around and prepares to make the loop once more. If you have a leak in the pump the fluid won't make it back to the reservoir, it will end up protecting your undercarriage from rust, or sitting in a small puddle in a Whole Foods parking lot somewhere.
Now that we know how it works and where the fluid goes lets talk about how to reseal this thing.
First you need to get the reseal kit. It costs $39.00, You can find it at Best Parts Online. They are located in Tustin CA. They might allow local pickup if you live close by but it's really just easier to take advantage of their free shipping.
The reseal kit should look like this:

It comes with a gasket for the rear cover, a gasket with three holes in it, a couple o-rings and two seals. I presume the two seals are for the shaft. I tried removing the shaft once and all I did was break one of the pulley mounting ears off. If your pump is leaking from the front seal you probably should have just bought a new pump. I don't know how to replace that seal. If your pump is leaking from where the front meets the rear housing you can throw those two seals away and continue reading.
Sooner or later you have to take the pump off of the engine. The pump is on the drivers side in the front of the engine. You will need to pull the upper fan shroud and the fan off the water pump. You will need to remove the serpentine belt also. You might want to leave the belt on for a minute and barely loosen the three bolts on the PS pump pulley. The tension and friction of the belt might make it easier. The pulley will want to spin if the bolts were overtightened. Once you have the belt off you will need to remove your AC compressor and ACE pump. Remove the four bolts holding the AC compressor and disconnect the plug. DO NOT REMOVE THE REFRIGERANT HOSES! Keep the hoses connected at all times. Disconnecting the hoses will cause harmful chemicals to be sprayed in your eyes, baby seals will die, a Walmart Supercenter will be built on the polar ice caps, and the EPA or CARB will be at your house within 15 minutes. Keep the hoses connected and gently set the AC compressor onto the air box or ABS pump. The hoses can handle being bent, but don't kink them too hard or yank on them. You can disconnect the lines on the ACE pump if needed. But read the manual and see what it says about that (pages 57-39 & 60-41).
When you have all of that stuff out of the way you will be left with just the bracket on the side of the head. There is a 10mm bolt on the top of the bracket under where the AC compressor was. There are three or four 13mm bolts holding the bracket to the head. Don't forget to remove the bracket securing the trans cooler lines, if it's still there. The pump is mounted on a stud. You have to slide the pump and the bracket forward away from the engine to remove it.
When you have the pump and bracket off of the engine you will need to remove the last two bolts securing the pump to the bracket and pry the pump from the bracket.
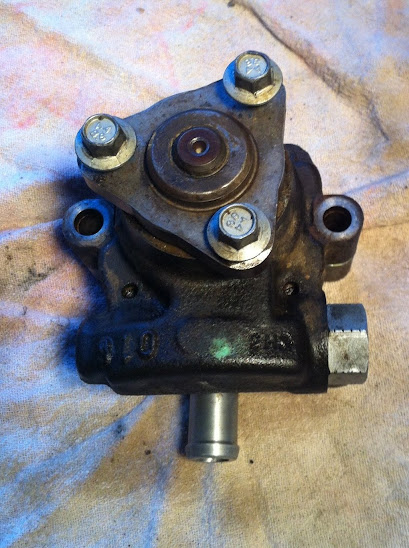
This is where the actual cool stuff starts to happen. Clean you pump off a bit. The cleaner the better, sort of, it's just going to get dirty again anyway so don't waste too much time on the cleaning, but you do want it pretty clean cause you don't want dirt & grime getting into the pump.
On the back of the pump you will find four Allen bolts as seen in the picture
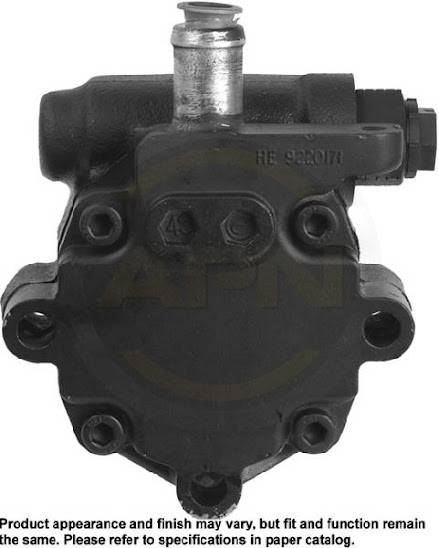
I forgot to take a picture of the rear of my pump so I borrowed the picture from this site. They sell power steering pumps but they are out of stock.
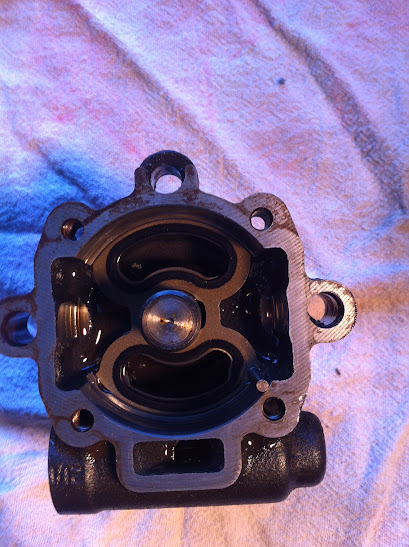
After pulling the back cover off you will see this:
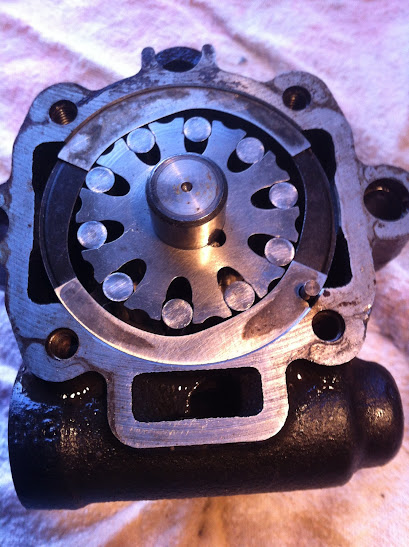
There might also be a beat up gasket that looks like it was made from yellow Playdough and Seran wrap. Dispose of any remains of the former gasket.
If you want you can just install the new gasket button it up and call it good. If you want to possibly turn it into a bigger headache please continue reading.
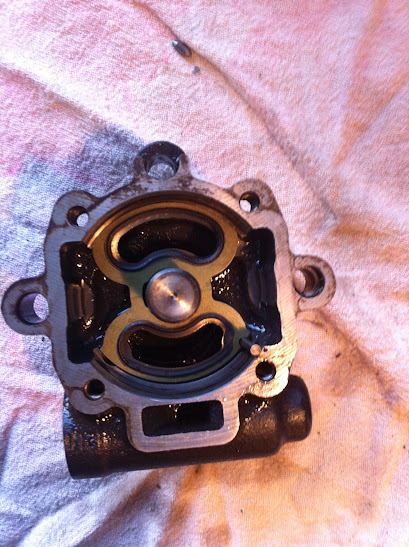
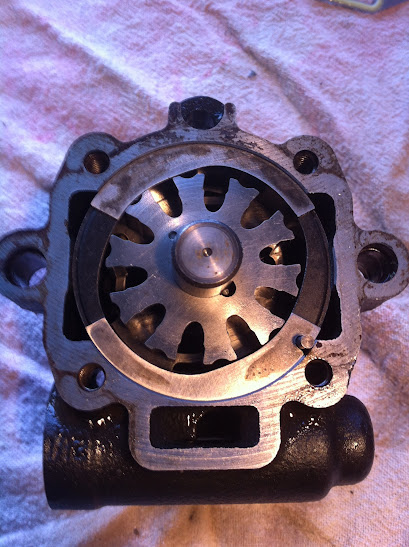
If you pull the rotor, rollers and cam ring out you will see where the gasket with three holes goes.
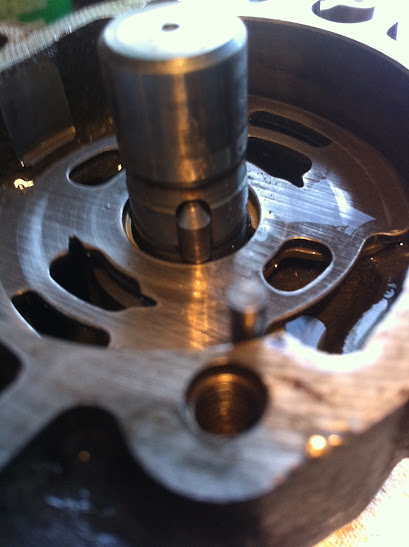
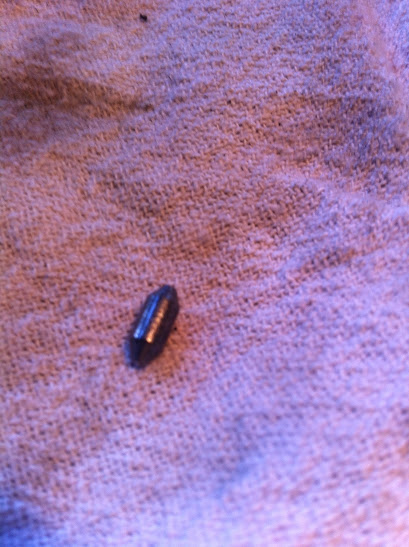
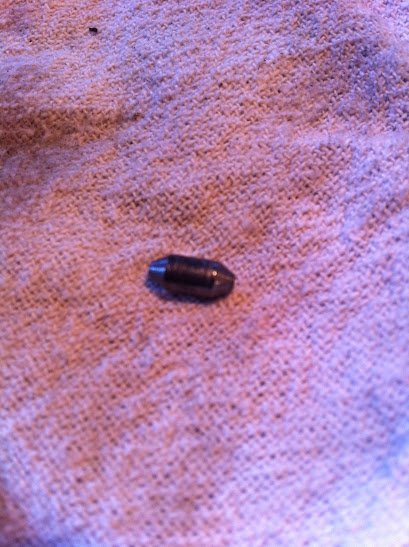
Don't loose the little dowel pin. Without it your pump won't work.
The gasket might be really stuck in there so don't feel bad if you have to pry on it a bit. Once you have it out you can put the new one in.
Make sure you put this little guy back in.
Fit the steel plate next to the new gasket. Fit the rotor and cam gear back in. Stick the rollers back in. If you lost a roller your pump might still work.
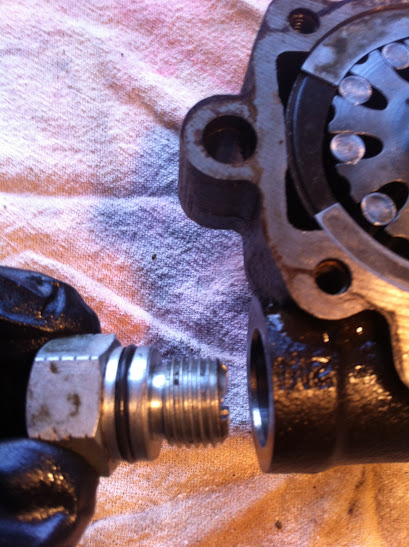
At some point you should take the adapter out of the pressure side and replace the o-ring. It's easier on the bench than in the car. Lube it with a little PS fluid before screwing it back in.
Button everything back up. Fit the rear gasket on dry. It doesn't need anything to help it seal. I didn't find a torque spec for the pump so use your own discretion when it comes to how tight to make the allen bolts. I used 12 ft lbs. You could probably get away with 14-18 ft lbs. But then again 10 ft lbs might be just right. Too loose and it won't seal correctly. To tight and it could squish the gasket and cause another leak.
Installing it into the vehicle is the reverse of removal. Refer to all torque specs on page 6-14 of your workshop manual. While the pump is out you should have angled your PS hoses down so they could drain into an approved catch basin. Now would be a good time to drain any extra PS fluid from the reservoir. If you want you can try to blow out the lines with compressed air. That might just make a big mess though.
Once you have everything hooked back up fill your reservoir with the correct type of fluid, or what ever you feel is appropriate. I personally don't know if any of the stop leak type stuff is worth it. I think it is too thick and doesn't flow correctly in the system. Resulting in more leaks and noise. Use the search function to figure out what kind of fluid everyone else is using and use it too.
Start the engine and turn the wheel lock to lock. I found that it was kind of hard to turn the wheel for a few miles. Maybe I should have bled the steering box. If you want to bleed the steering box refer to page 57-18 in your workshop manual. Otherwise drive it around and eventually it will loosen up and become easier to turn. Don't run into anything.
Hopefully it all works well now and your pump doesn't leak or make noise.
That's all, if you have any questions please refer to your workshop manual.
How Power Steering works: This is a very complicated topic but I will do my best to simplify it. Power Steering Fluid lives in the Power Steering Reservoir, it is then drawn into the Power Steering Pump via the suction/intake hose. Once it is in the pump it gets spin around real fast, stuff happens and it is discharged out of the pressure line at a real high pressure. From the pressure line it travels into the Power Steering Box. Inside the box the fluid gets moved around to different areas, lights flash, magic happens, and music plays. A good while after last call the fluid stumbles out of the Power Steering box and into the low pressure line. This low pressure line is also the return line that carries the fluid back to the Reservoir. When the fluid gets back into the reservoir it gets swirled around and prepares to make the loop once more. If you have a leak in the pump the fluid won't make it back to the reservoir, it will end up protecting your undercarriage from rust, or sitting in a small puddle in a Whole Foods parking lot somewhere.
Now that we know how it works and where the fluid goes lets talk about how to reseal this thing.
First you need to get the reseal kit. It costs $39.00, You can find it at Best Parts Online. They are located in Tustin CA. They might allow local pickup if you live close by but it's really just easier to take advantage of their free shipping.
The reseal kit should look like this:
It comes with a gasket for the rear cover, a gasket with three holes in it, a couple o-rings and two seals. I presume the two seals are for the shaft. I tried removing the shaft once and all I did was break one of the pulley mounting ears off. If your pump is leaking from the front seal you probably should have just bought a new pump. I don't know how to replace that seal. If your pump is leaking from where the front meets the rear housing you can throw those two seals away and continue reading.
Sooner or later you have to take the pump off of the engine. The pump is on the drivers side in the front of the engine. You will need to pull the upper fan shroud and the fan off the water pump. You will need to remove the serpentine belt also. You might want to leave the belt on for a minute and barely loosen the three bolts on the PS pump pulley. The tension and friction of the belt might make it easier. The pulley will want to spin if the bolts were overtightened. Once you have the belt off you will need to remove your AC compressor and ACE pump. Remove the four bolts holding the AC compressor and disconnect the plug. DO NOT REMOVE THE REFRIGERANT HOSES! Keep the hoses connected at all times. Disconnecting the hoses will cause harmful chemicals to be sprayed in your eyes, baby seals will die, a Walmart Supercenter will be built on the polar ice caps, and the EPA or CARB will be at your house within 15 minutes. Keep the hoses connected and gently set the AC compressor onto the air box or ABS pump. The hoses can handle being bent, but don't kink them too hard or yank on them. You can disconnect the lines on the ACE pump if needed. But read the manual and see what it says about that (pages 57-39 & 60-41).
When you have all of that stuff out of the way you will be left with just the bracket on the side of the head. There is a 10mm bolt on the top of the bracket under where the AC compressor was. There are three or four 13mm bolts holding the bracket to the head. Don't forget to remove the bracket securing the trans cooler lines, if it's still there. The pump is mounted on a stud. You have to slide the pump and the bracket forward away from the engine to remove it.
When you have the pump and bracket off of the engine you will need to remove the last two bolts securing the pump to the bracket and pry the pump from the bracket.
This is where the actual cool stuff starts to happen. Clean you pump off a bit. The cleaner the better, sort of, it's just going to get dirty again anyway so don't waste too much time on the cleaning, but you do want it pretty clean cause you don't want dirt & grime getting into the pump.
On the back of the pump you will find four Allen bolts as seen in the picture
I forgot to take a picture of the rear of my pump so I borrowed the picture from this site. They sell power steering pumps but they are out of stock.
After pulling the back cover off you will see this:
There might also be a beat up gasket that looks like it was made from yellow Playdough and Seran wrap. Dispose of any remains of the former gasket.
If you want you can just install the new gasket button it up and call it good. If you want to possibly turn it into a bigger headache please continue reading.
If you pull the rotor, rollers and cam ring out you will see where the gasket with three holes goes.
Don't loose the little dowel pin. Without it your pump won't work.
The gasket might be really stuck in there so don't feel bad if you have to pry on it a bit. Once you have it out you can put the new one in.
Make sure you put this little guy back in.
Fit the steel plate next to the new gasket. Fit the rotor and cam gear back in. Stick the rollers back in. If you lost a roller your pump might still work.
At some point you should take the adapter out of the pressure side and replace the o-ring. It's easier on the bench than in the car. Lube it with a little PS fluid before screwing it back in.
Button everything back up. Fit the rear gasket on dry. It doesn't need anything to help it seal. I didn't find a torque spec for the pump so use your own discretion when it comes to how tight to make the allen bolts. I used 12 ft lbs. You could probably get away with 14-18 ft lbs. But then again 10 ft lbs might be just right. Too loose and it won't seal correctly. To tight and it could squish the gasket and cause another leak.
Installing it into the vehicle is the reverse of removal. Refer to all torque specs on page 6-14 of your workshop manual. While the pump is out you should have angled your PS hoses down so they could drain into an approved catch basin. Now would be a good time to drain any extra PS fluid from the reservoir. If you want you can try to blow out the lines with compressed air. That might just make a big mess though.
Once you have everything hooked back up fill your reservoir with the correct type of fluid, or what ever you feel is appropriate. I personally don't know if any of the stop leak type stuff is worth it. I think it is too thick and doesn't flow correctly in the system. Resulting in more leaks and noise. Use the search function to figure out what kind of fluid everyone else is using and use it too.
Start the engine and turn the wheel lock to lock. I found that it was kind of hard to turn the wheel for a few miles. Maybe I should have bled the steering box. If you want to bleed the steering box refer to page 57-18 in your workshop manual. Otherwise drive it around and eventually it will loosen up and become easier to turn. Don't run into anything.
Hopefully it all works well now and your pump doesn't leak or make noise.
That's all, if you have any questions please refer to your workshop manual.
Last edited:
