The tinworm cometh

Spark6

Well-known member
Oct 31, 2020
127
40
New Hampshire
Winston Churchill (our ‘98 Disco I) has cancer. As so many rigs of this age do, to be sure, but this rot stands between me and getting the old man through state inspection here in NH, so into the mire we go…

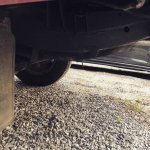
I would likely have remained blissfully unaware of this whole situation, for a little while yet, at least, had the exhaust pipe not rusted through and fallen off one day shortly before my wife and I packed up our lives to move from Pittsburgh, PA, back east to central NH. Alas, there wasn’t time to get a replacement pipe mounted before the journey, and come on, it’s a Land Rover! So Winston made the 800mi trek to his new home behind a Uhaul truck:

ADA10C04-DAD2-42D5-B153-7F4A327DD6D4.jpeg
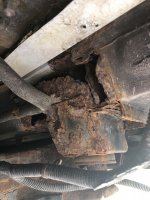
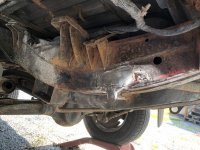
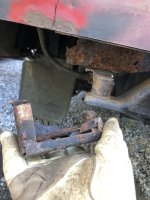
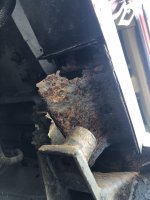
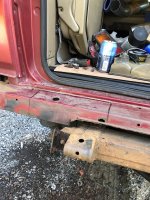
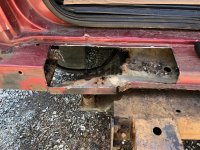
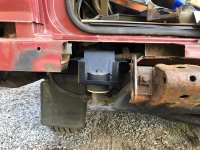
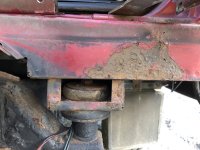
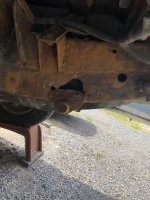
In the process of investigating the fallen tailpipe, I removed (erm… ripped off) the old drop-down step from the frame rail, and lo, and behold… the gaping maw of a rust hole - long hidden. 8AC2E798-3746-43FE-A73E-2627637DA8E8.jpeg Where there’s one, there are often others, so now able to stick my head into the space usually occupied by the rear muffler, I started to inspect with a flashlight, and found that the rear body mount was held on by iron oxide and nothing more. 🤬 8D087303-EDC0-4F10-9F75-17CA1B62216A.jpegThis too, was certainly not going to be handled in our apartment complex parking lot, mere weeks before we were due to depart, so the can got kicked down the road, until we could get settled and I could get my welder out of storage.
To be continued…
 

Blueboy

Well-known member
Apr 20, 2004
3,212
462
Back in the USA; Rockwood, PA
As also living in W. PA. understand what you are facing and why the ‘94 Rangie hibernates during the Winter and ‘96 D1 rarely goes out. That liquid crap and salt just kills our vehicles here.

Good luck with the repairs as the body looks pretty good.
 
  • Like
Reactions: Spark6

Spark6

Well-known member
Oct 31, 2020
127
40
New Hampshire
To continue our tale…

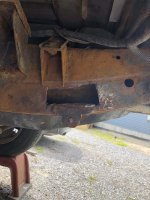
After getting *mostly* moved into the new place, and digging the welder out of storage, I went to work tackling the frame hole, as it seemed like the easiest set of welds, and I haven’t picked up a welder in about six years.
2EFB3722-0582-4403-8822-3CBEEA89BBEC.jpeg
Angle grinder to start. Took a bit of cutting to find clean metal, but not as bad as it could be. Then the work begins…
1A0F1219-A491-4130-A8C6-1AE9A6161B12.jpeg
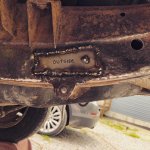
I spent almost as much time wrestling the welder back into serviceable condition (how does a grub screw back off during six years of storage?!?) as I did on the welds. Yes, they are pretty ugly… but they pass the hammer test, and I’m slowly remembering how it all works. Back to the grinder.
1DC42F95-869F-4109-BC45-FB7AB2D1B3A3.jpeg
In the process of grinding…
FC01956B-CF3C-4090-924D-12736165211E.jpeg
Skip forward a few steps, spray a BUNCH of rust converter followed by paint, and it is a passable repair. I’m not winning any awards for beauty, but that will pass state inspection.

To be continued…
 

Spark6

Well-known member
Oct 31, 2020
127
40
New Hampshire
As also living in W. PA. understand what you are facing and why the ‘94 Rangie hibernates during the Winter and ‘96 D1 rarely goes out. That liquid crap and salt just kills our vehicles here.

Good luck with the repairs as the body looks pretty good.
Boy does it! Seems like you can almost hear the frames sizzling away… whatever happened to just spreading cinder and letting people learn to drive in the snow?!? Haha
 

p m

Administrator
Staff member
Apr 19, 2004
15,631
864
58
La Jolla, CA
www.3rj.org
I feel so bad for you guys in the rust belt. You may want to make a trip to SouthWest with a trailer - at least, to pick up rust-free frames from the junkyards.
 
  • Like
Reactions: Blueboy

pdxrovermech

Well-known member
Jul 3, 2009
1,807
57
Portland, OR
Im so glad I'm not a mechanic of the East coast. I never see anything that bad unless its an old Defender thats been recently shipped over from across the pond. Be sure to take a good look around your spring perches as I've heard stories of rusty examples peeling right off the frame during cornering and resulting in a rollover.
 
  • Like
Reactions: Spark6

Blueboy

Well-known member
Apr 20, 2004
3,212
462
Back in the USA; Rockwood, PA
Boy does it! Seems like you can almost hear the frames sizzling away… whatever happened to just spreading cinder and letting people learn to drive in the snow?!? Haha
And what rubs salt in the wound (pun intended) many of us drove front heavy cars with V8s and light rear end with rear drive in the hills of W. PA. without problems. Now most drive AWD or such and the roads have to bare in 24hours.

My first welds were classified as looking like “chicken shit”! Function over form and a grinder as you know is your friend.

Good luck with the repairs.
 
  • Like
Reactions: Spark6

Blueboy

Well-known member
Apr 20, 2004
3,212
462
Back in the USA; Rockwood, PA
Nice work. You east coast guys have it rough
Especially with a RRC. Rusts from inside out. The steel subframe was only prime painted from LR. One really can’t drive a RRC in the East during the Winter if you want to keep it. Mine totally hibernates except on deep snow days before the plow comes on my dirt rural road. For the most part same with the D1.

I spray with hot water the undercarriage of the ski car every day in the garage after a ski day at the local area.
 

Spark6

Well-known member
Oct 31, 2020
127
40
New Hampshire
It’s funny, of late I’ve found myself frequently daydreaming of finding a minty Disco I frame in some scrapyard in Arizona. Alas, I suspect most have all been long scrounged up. It seems a pity that there isn’t someone who builds replacement frames for these trucks the way they do for the Series and Defenders. With the prices that the Discos are starting to command, (and how irrationally attached most of us are to our trucks) you’d think there’d be a market… go figure.

Anyway, where were we… ah yes, the body mount. First things first, was to source a new mount and bracket. Neither AB nor Rovers North had one, or even reference to one on their websites. Thank goodness for globalism… Froggats bailed me out and shipped over a lifeline from the UK. Now, for the ugly part.

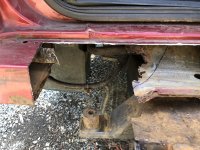
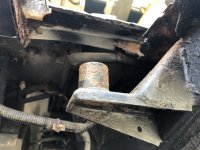
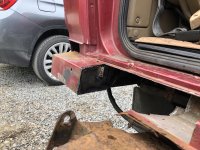
To gain access to the top of the mounting bolt, I had to pull the rear bumper. All four mounting bolts sheered off (NATURALLY), even after soaking in PB Blaster for 24hrs. Awesome. Ultimately, I console myself, at this point, cold-chiseling some rusty blind nuts, and welding new ones on is hardly much of an escalation beyond what I have planned. After much wrestling with the broken off bolts (which didn’t have the courtesy to break off BELOW the mounting holes) the bumper came free, revealing the dilly of a pickle that I was about to wade into. The mount was tenuously held onto the body by two rotted strings of remaining steel. In loosing the body mount bolt (which was in shockingly good shape) the mount twisted/broke free. Easier to remove, I guess.
Body mount.jpg
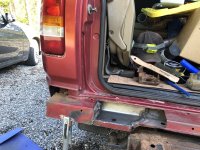
Once the mount was gone, however, it became clear that the rot had consumed much of the rear body crossmember as well.
Blown-out crossmember.jpg
And to access that, properly, I’d need to come at it from the top. So, with a fresh battery in my grinder, and a cold beverage or two to steady my nerves and bolster my confidence, I dove in.
Planned surgery.jpg
Post-cut.jpg
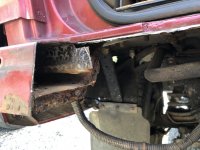
The results were as disheartening as I’d feared, but with a gaping hole carved into our beloved Winston, there is no way but forward.
Fully cut.jpg
View from below.jpg
Side view.jpg
The plan is, to finish removing the rotted metal as best I can, and then bend and shape new panels to weld in to re-form the bottom and interior of the crossmember. I'll also strip clean the flange on the left side, and weld a bulkhead there (which drainage cut in!) which will also help stiffen the area for the body mount. Finally, I’ll weld the top panel that I removed back in, and we’ll have a sound crossmember. From there, I can orient and weld in the body mount. Or that’s the goal. To paraphrase Moltke, “no plan survives contact with the enemy.”

The good news is, the chassis side of the mount is in very good shape. So if I can get this portion of the body back to soundness and the new mount welded up, I should have a pretty solid corner. Then we can get back to our regularly scheduled Land Rover ownership. Ha!

More to come.
 

terryjm1

Well-known member
Jan 23, 2011
1,490
375
I have a 96 with very similar rear crossmember issues. Feel free to make a couple extra patch panels to send my way. 😊
 
  • Like
Reactions: Spark6

Spark6

Well-known member
Oct 31, 2020
127
40
New Hampshire
Well, I'm back to the grindstone after a 5 days away on work, so the shenanigans continue. Last night, I discovered a new complication that has me scratching my head a bit. I test-fit the new body mount bracket to get a sense of where it was going to go on the repair, and where I'd want to build up some reinforcing structure so all the load wasn't being taken by the new skin... New mount.jpg

As you can see, the flange on the mount is about 3/8" ABOVE what will be the surface it is welded to. Some of this is due to how nice and fresh (and uncompressed) the bushings are, because here's the other side:
Old (RH) mount.jpg
Please ignore the utterly scabrous surroundings... the whole thing will get cleaned up, and one day, perhaps replaced as well, but for now, we're just trying to get through inspection... (or that's what I'm forced to remind myself so I don't have a fit and tear the whole body off the frame in an attempt to fully restore it... *twitches* )

Clearly, over 23 years, rubber compresses. But I suspect that in addition, I have some body sag on the left corner that I probably also contributing to the mount standing so proud. At this juncture, the plan is to replace the skin of the crossmember (it's almost completely fabricated and ready for welding today or tomorrow) and then try to GENTLY jack the corner of the body up high enough to fit the mount between the chassis mount and the body, so that it can be welded on. I suppose there is always the alternative of carving down the bushings to get clearance, and if it comes to that, I suppose anything to get this thing plated and back on the road, but I really try to avoid that sort of hackney approach to maintaining things... Wise input is currently being solicited!

Onward...
 

ERover82

Well-known member
Nov 26, 2011
3,918
458
Darien Gap
Well, I'm back to the grindstone after a 5 days away on work, so the shenanigans continue. Last night, I discovered a new complication that has me scratching my head a bit. I test-fit the new body mount bracket to get a sense of where it was going to go on the repair, and where I'd want to build up some reinforcing structure so all the load wasn't being taken by the new skin... View attachment 61745

As you can see, the flange on the mount is about 3/8" ABOVE what will be the surface it is welded to. Some of this is due to how nice and fresh (and uncompressed) the bushings are, because here's the other side:
View attachment 61746
Please ignore the utterly scabrous surroundings... the whole thing will get cleaned up, and one day, perhaps replaced as well, but for now, we're just trying to get through inspection... (or that's what I'm forced to remind myself so I don't have a fit and tear the whole body off the frame in an attempt to fully restore it... *twitches* )

Clearly, over 23 years, rubber compresses. But I suspect that in addition, I have some body sag on the left corner that I probably also contributing to the mount standing so proud. At this juncture, the plan is to replace the skin of the crossmember (it's almost completely fabricated and ready for welding today or tomorrow) and then try to GENTLY jack the corner of the body up high enough to fit the mount between the chassis mount and the body, so that it can be welded on. I suppose there is always the alternative of carving down the bushings to get clearance, and if it comes to that, I suppose anything to get this thing plated and back on the road, but I really try to avoid that sort of hackney approach to maintaining things... Wise input is currently being solicited!

Onward...

Either replace all body mount bushings with new, or shim the others with washers. Either way they should all support the body at the same height.
 
  • Like
Reactions: Spark6

Spark6

Well-known member
Oct 31, 2020
127
40
New Hampshire
Either replace all body mount bushings with new, or shim the others with washers. Either way they should all support the body at the same height.
That’s solid advice. I’ll see if I can’t track down another rear mount bushing for the passenger side that can be delivered on the timetable needed. Doing all the mounting bushings on the truck is definitely needed, but outside the scope of trying to get this thing legal inside the window allowed upon becoming a resident of a new state.
 

Blue

Well-known member
Mar 26, 2004
10,056
869
AZ
Cut out and replace the passenger side rear body mount as well?

Want me to check some local junk yards for D1 frames? LOL
 
  • Like
Reactions: salvvia

Spark6

Well-known member
Oct 31, 2020
127
40
New Hampshire
Cut out and replace the passenger side rear body mount as well?

Want me to check some local junk yards for D1 frames? LOL
:ROFLMAO: That successfully raised my blood pressure! Ha. Eventually will need doing though.

Where are you located? A clean frame is high on my long term acquisition list. Though at this rate, I might need a clean body too…

I started sticking parts back together yesterday, until the rain started, and welding in my driveway seemed to be a poor life decision, so I had to quit. Only really managed one part, and I still need to go back at finish it up, but there’s more metal on the truck than there was yesterday morning:
FCA11D2D-9639-4B0E-922C-1737AB1FEF3A.jpeg

Rain has finished up where we are, so after my dump run, I’ll pull the tools out and get back to it. Maybe by tonight I’ll have the bottom skin put back together!

Ever forward…
 
  • Like
Reactions: terryjm1

terryjm1

Well-known member
Jan 23, 2011
1,490
375
A few months ago I purchased a nearly rust free 96 D1 for $1500 but I had to go to northern CA to get it. It only has a bit of rust under the alpine window seals. That being said, I still plan to carry out rust repairs similar to what you have going on another one I have.
 

Spark6

Well-known member
Oct 31, 2020
127
40
New Hampshire
A few months ago I purchased a nearly rust free 96 D1 for $1500 but I had to go to northern CA to get it. It only has a bit of rust under the alpine window seals. That being said, I still plan to carry out rust repairs similar to what you have going on another one I have.
A $1500 rust-free D1?! :eek: Sounds like I need to take a trip out west!

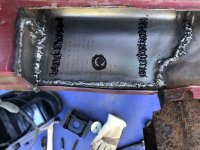
After getting home from the weekly dump run, (no trash service up here) Winston had dried out, and so the welder came back out. I managed to finish the bulkhead, and then get to work on the bottom skin. Even after scouring the rusty old metal, I still struggled to keep the bead from burning through and causing voids, but I was able to spread the bead out and then turn up the volts and get a cohesive, (if somewhat oversized) bead. It certainly passes the hammer-test!
4A9C542D-5DEA-4138-B2DE-50DE2413D72D.jpeg
A9DB5918-0CE4-4FA2-88F6-F214DAAD506A.jpeg
The sharpie marks indicate where the body mount will ultimately go, and where I’ll weld some stiffeners to ensure that the panel remains rigid under load. The circle will be drilled out to allow access to the body mount bolt head. The welds are still a bit booger-y, but I can slowly feel myself improving. Maybe by the time I’m done with the whole truck, I’ll feel like I have my mojo back. Ha!

Tomorrow is the last day of my weekend before I head back to work, so I’d like to get the repair closed out, so it’s at least weather-proof. We’ll see if I succeed…
 
  • Like
Reactions: terryjm1