| Author | Message | ||
Phil (Discoanywhere) Member Username: Discoanywhere Post Number: 129 Registered: 06-2003 |
95 D1 - Heres a couple picks of a major repair to our 95 D1 project truck... We replaced the rear floor section with checker plate (bolt in) and reinforced the floor. Its a work in progress so I'll post more tommorrw night... 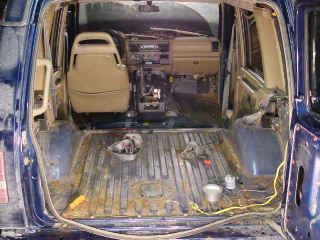 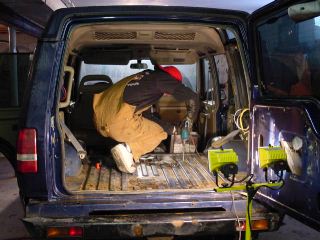 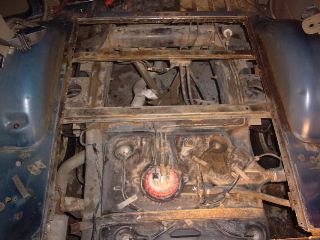 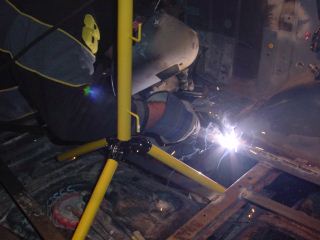 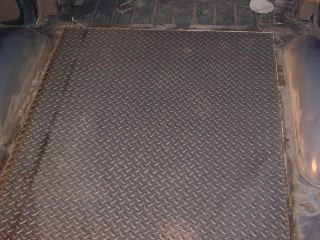 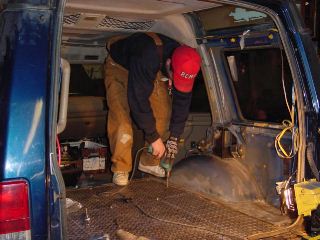 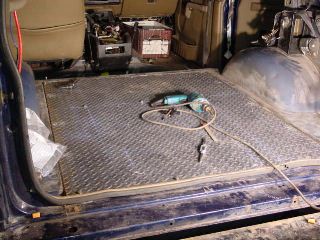 -We'll bolt the checker plate down by tapping into the frame we built for the floor. Once everything is lined up and dialed in we will dismantle and prep to prime, paint and undercoat. A silicone seal will be applied and the plate bolted down. Then onto sandblasting/repairing the rest of the floor and rhino coating... | ||
Porter Mann (Porter) Member Username: Porter Post Number: 134 Registered: 05-2003 |
what about a hole to access the fuel pump. | ||
Phil (Discoanywhere) Member Username: Discoanywhere Post Number: 130 Registered: 06-2003 |
We thought about it... but decided to make the entire panel removable.. Just flip the rear seats forward undo 12 bolts and two seat belt bolts and theres access to more then just the fuel pump! Probably not practical for most... but i like! | ||
Peter J Blatt (Peteb) Senior Member Username: Peteb Post Number: 335 Registered: 10-2002 |
I second the access tothe fuel pump, you will be there, and if you silicone the diamond plate down, and have 12 bolts, and rhino lining down, you are talking 1-2 hours for a 5 min job, I as well as others have had to access the fuel pump on the trail, Porter is right! spend the few minutes to make an access, you have done a great job thus far!!! | ||
Chris Browne (Chris_browne) Senior Member Username: Chris_browne Post Number: 642 Registered: 02-2003 |
This isn't really what I wanted to see....but I fear a similar sight on my 95 d1.... | ||
Nadim Samara (Discodino) Senior Member Username: Discodino Post Number: 288 Registered: 02-2003 |
My 1992 is VERY rust free considering its 12 years old! Never the less, took out ALL the carpets and now the steel floor meets moisture and wicks it away MUCH easier than having a damp carpet! 10 minutes...well worth it, plus lost around 30lbs in foam  | ||
Phil (Discoanywhere) Member Username: Discoanywhere Post Number: 133 Registered: 06-2003 |
Carpet definately destroys cars up here in Canada.. One salty Ontario winter and that stuff is soaked to the floor for the cars life unless you rip it out and keep on it... I've ripped the carpet out of every Jeep I've owned.. The only draw back is more noise and heat (or cold).. I always use a thick bedliner type paint helps reduce the noise and heat..and under coat the bottom.. anyway I'm bablin again..heres a couple more pics of the floor.. We finished the final sand blasting spots, drilled and tapped all holes, primed and painted the reinforced framing we welded in.. and tommorrow we mount the floor. We decided to split the floor into two sections. A small section at the rear will make it easier to access the fuel pump...thanks for the input!!  Heres a pic of how some properly placed decals can improve the performance of your disco and something that might scare you...Me with a grinder going inside a disco! lol 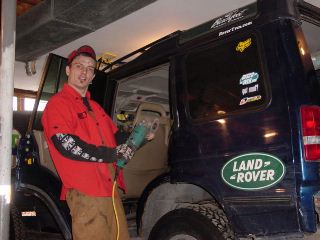 Later folks.. PS... C.K email me | ||
Chris Browne (Chris_browne) Senior Member Username: Chris_browne Post Number: 644 Registered: 02-2003 |
Dweb stickers increase performance more than LR stickers. Being after market there is no need to conform with emission controls..... | ||
Phil (Discoanywhere) Member Username: Discoanywhere Post Number: 135 Registered: 06-2003 |
Your right! Aftermarket stickers are ussually much better.. higher quality, better performance, and easier on the eyes.. As you can see by the photo the LR decal would need to be twice as big to have the effect of the Dweb or the Rovertym decal.. And then with such a large decal you run into eye sore issues, weight issues, and free advertising for multi million dollar corps.. I'd strongly recommend after market decals.. When I do it over I'll go custom! Which is even cooler then after market! | ||
Micky_dee (Micky_dee) Member Username: Micky_dee Post Number: 74 Registered: 11-2003 |
man i cant belive that that much rust and corrosion is in there! well it looks as thought you have done a beautty job. congrats. |