Discovery II Mantec Snorkel Installation
Photos and text by Dean Brown
Tools used:
- Masking tape
- Torx 25 screwdriver
- Philips screwdriver
- Pliers
- Socket set - with at least 12 inch extension bar.
- Dremel hand tool and cut-off disks (plenty)
- Electric drill + bits
- Silicone sealant or equivalent.
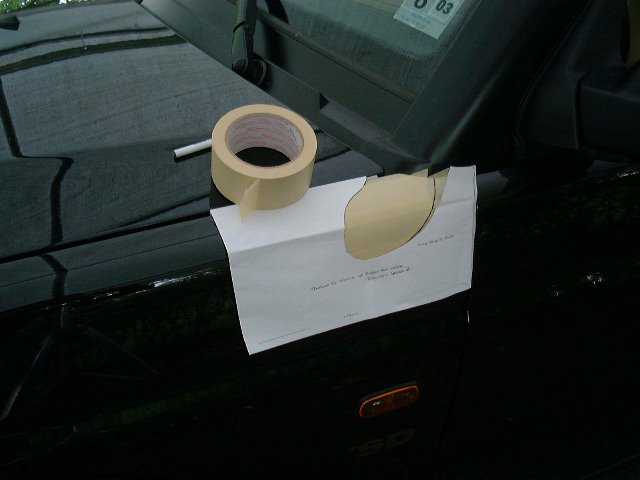
1. Cut out the paper hole from the template supplied, fold over the dotted lines, and position it
over the side of the car. Remove and put masking tape over a larger area and put back the template.
This allows you to draw onto the panel easily.
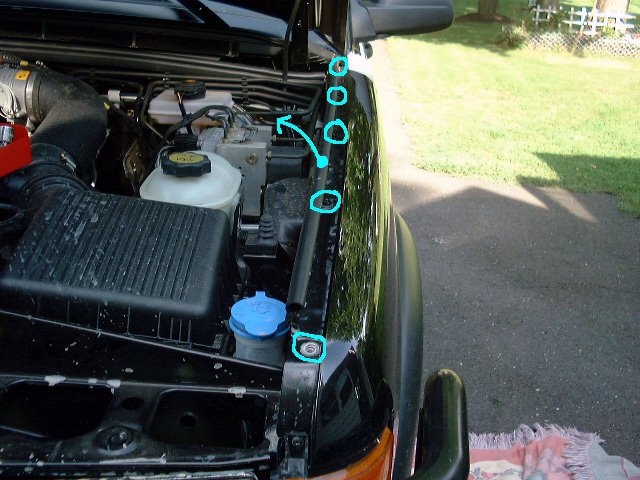
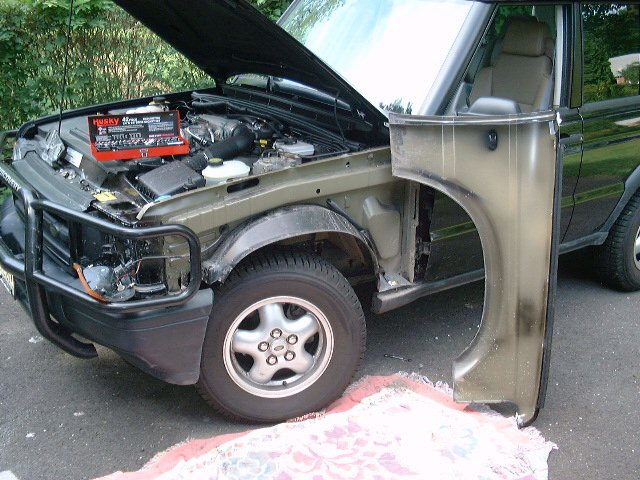
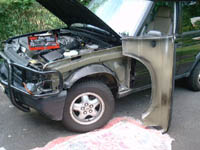
 2. Remove the panel, following the next few steps. Undo the 5 bolts attaching the top of
the panel to the engine compartment wall. Lift up the rubber seal (arrow) to get to the
bolts more easily. Its presses back on. The bolts come out of retained clips that stay where they are.
2. Remove the panel, following the next few steps. Undo the 5 bolts attaching the top of
the panel to the engine compartment wall. Lift up the rubber seal (arrow) to get to the
bolts more easily. Its presses back on. The bolts come out of retained clips that stay where they are.
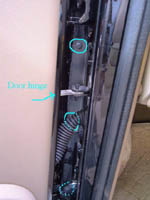
 3. Open the door, and remove the three bolts attaching the panel's rear side. Sorry -
could only get one bolt in the photo.
3. Open the door, and remove the three bolts attaching the panel's rear side. Sorry -
could only get one bolt in the photo.
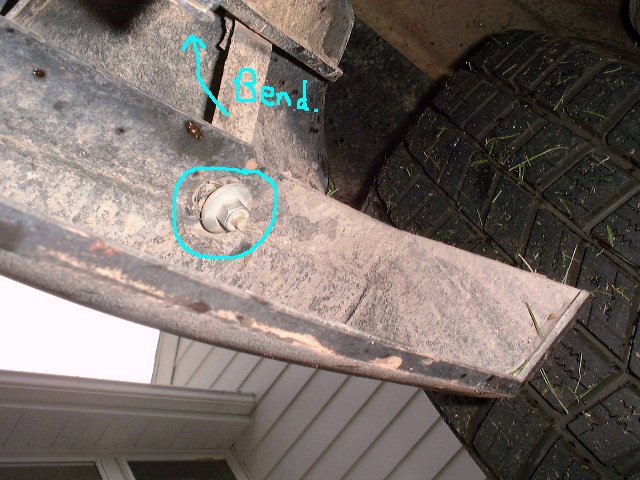
 4. Remove the bolt holding the panel to the front of the plastic sill, and bend the metal
attachment up to get the bolt free of the panel.
4. Remove the bolt holding the panel to the front of the plastic sill, and bend the metal
attachment up to get the bolt free of the panel.
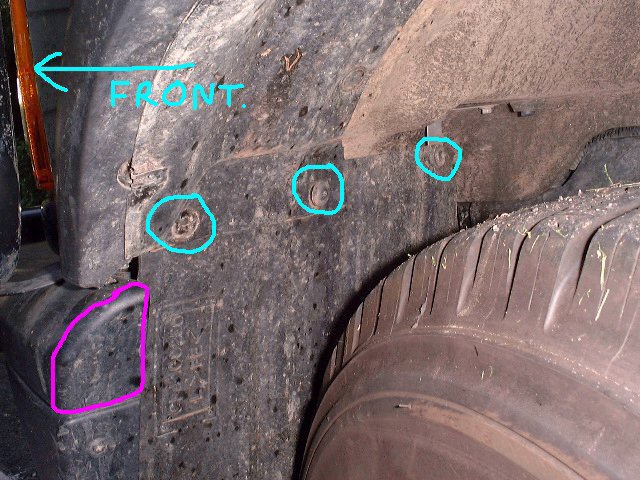
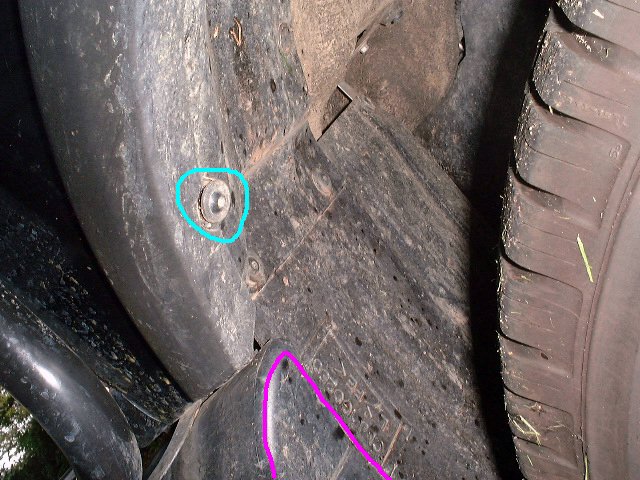
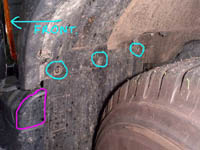
 5. Remove the three bolts between the plastic plate in front of the wheel and the wheel
arch: The purple color is to reference in the next photos.
5. Remove the three bolts between the plastic plate in front of the wheel and the wheel
arch: The purple color is to reference in the next photos.
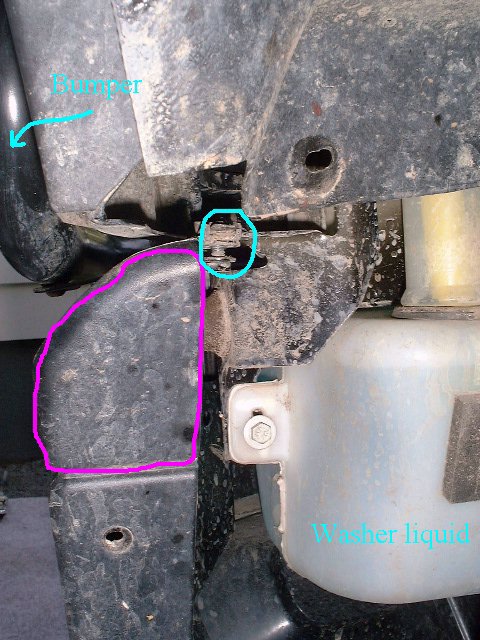
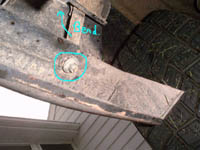
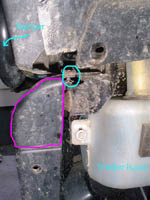
 6. Remove the bolt between the panel and the bumper mount: For reference, the purple line is the
same piece as shown in the previous photo.
6. Remove the bolt between the panel and the bumper mount: For reference, the purple line is the
same piece as shown in the previous photo.
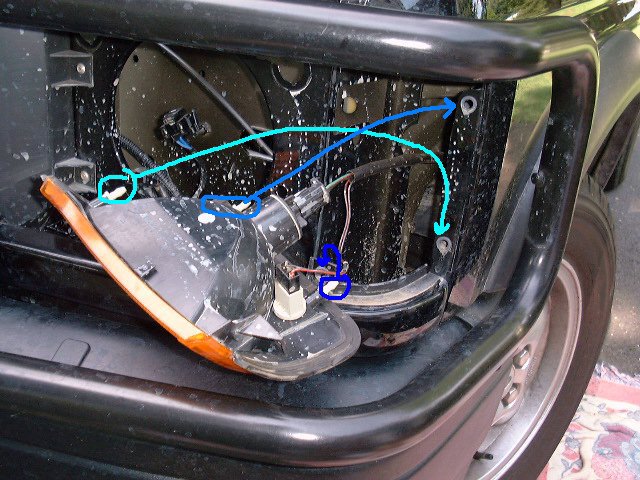
 7. Remove the headlight (unclip both cables, and undo three plastic locking nuts).
Remove the signal light by removing the screw at its top and pulling the housing
directly forward. The three press-in fittings should pop out with just a bit of heaving:
7. Remove the headlight (unclip both cables, and undo three plastic locking nuts).
Remove the signal light by removing the screw at its top and pulling the housing
directly forward. The three press-in fittings should pop out with just a bit of heaving:
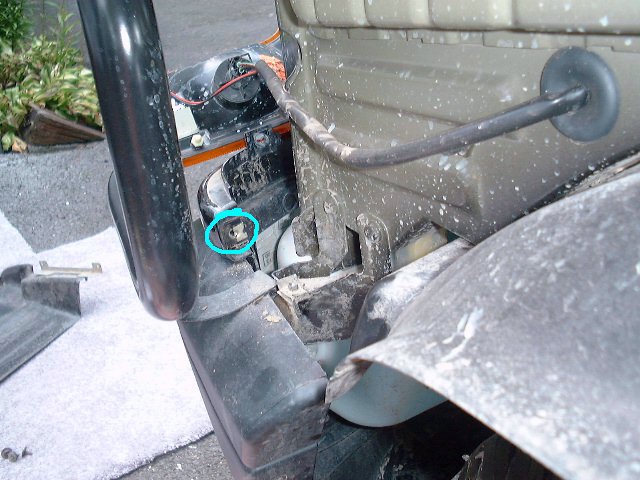
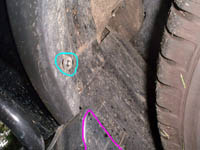
 8. Remove the three (Torx 25) bolts at the wheel arch (one shown). Note the middle one is
slightly different, with a plastic washer attached.
8. Remove the three (Torx 25) bolts at the wheel arch (one shown). Note the middle one is
slightly different, with a plastic washer attached.
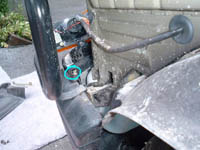
 9. Remove the bolt attaching panel to front plastic bumper trip using a 12 inch extension
and socket (all same size socket throughout): For clarity, this photo has the panel removed
already, otherwise impossible to photograph.
9. Remove the bolt attaching panel to front plastic bumper trip using a 12 inch extension
and socket (all same size socket throughout): For clarity, this photo has the panel removed
already, otherwise impossible to photograph.
 10. Panel should come off. If it doesn't, I have forgotten a bolt somewhere, sorry.
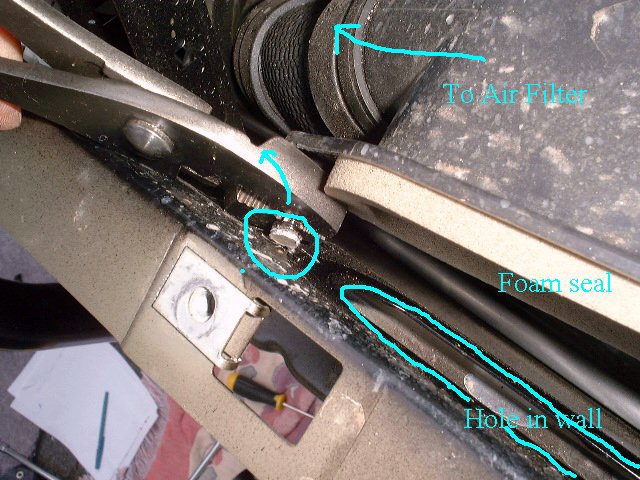
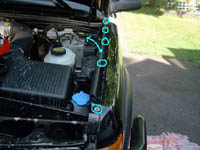
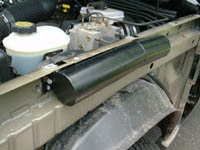
 11. Undo the two plastic nuts attaching the air filter trumpet to the firewall.
Bend trumpet out of the way. Break off the two metal bolts that these were screwed
onto. They should just snap off. The snorkel comes with bolts that will go through
the holes here. You might have to drill out the holes a little.
11. Undo the two plastic nuts attaching the air filter trumpet to the firewall.
Bend trumpet out of the way. Break off the two metal bolts that these were screwed
onto. They should just snap off. The snorkel comes with bolts that will go through
the holes here. You might have to drill out the holes a little.
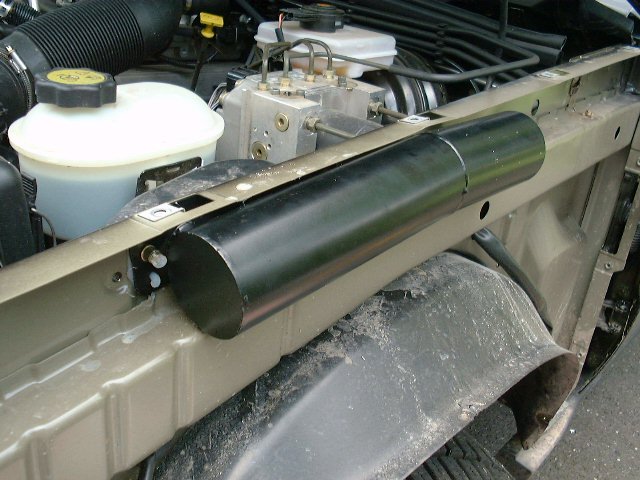
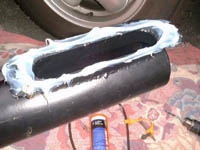
 12. The instructions with the snorkel don't say this, but I put gobs of silicone sealant
between the snorkel and the firewall, to make a better seal. Quickly press up against the
firewall and attach with bolts supplied.
12. The instructions with the snorkel don't say this, but I put gobs of silicone sealant
between the snorkel and the firewall, to make a better seal. Quickly press up against the
firewall and attach with bolts supplied.
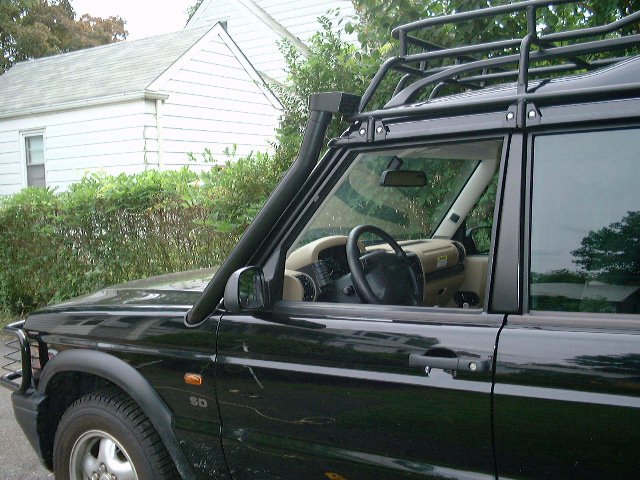
 13. Attach the flexible pipe to this tube with the ring clamp provided. Attach the other end of the flexible pipe to the upright air intake, and attach with second ring clamp. Hold the upper end of the upright pipe to the roof rack if you have one, using a bungee cord or string. This will help hold it all in place later. With no roof rack, you might need someone to help hold it steady.
The bottom end of the upright intake has a flat metal plate with two holes. (Sorry, no photo). You will later drill through these holes into the frame and fix with self-tapping screws supplied, but don't do this until you have cut out the big panel hole:
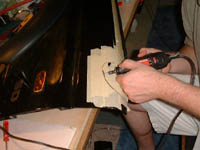
Using a dremel tool with cut-off disks (Sears. I got through 5 or 6), cut out the hole for the snorkel, as shown. The panel is aluminum, and easy to cut. Wear eye protection here. At the ends, cut off any metal fixtures that will hinder the snorkel sliding through. The hole is not a closed circle, but more a U-shape cut out.
 14. Now you are ready to start attaching the panel, and adjusting the snorkel upright tube till its all snug. COVER ANY PARTS OF THE SNORKEL WITH MASKING TAPE, IF THEY WILL RUB AGAINST THE SHARP EDGE OF THE PANEL. Put masking tape near the top of the intake too, to stop it scratching the roof. Also where it could rub on the inside of the wrap-bumper when you take it off.
Now you may need to trim a little more away from the panel to make it fit nicely. Also, take a look inside the engine compartment to see if any metal protrudes in the way. I had to cut out a very small corner of the firewall to get it all to fit.
Once you are happy with the fit, remove the panel and mark the holes in the frame where the upright intake tube will have to be screwed in. Drill small holes and fit with self-tapping screws provided.
Attach the edging to the cut-out hole in the panel, and trim to length. Then, being careful not to scratch car / snorkel, fit the panel into place. If it seems like it won't slide back enough, it may be catching at the back end of the panel by the door.
Re-connect the panel, essentially doing the reverse of all the previous steps.
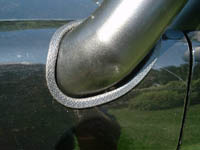
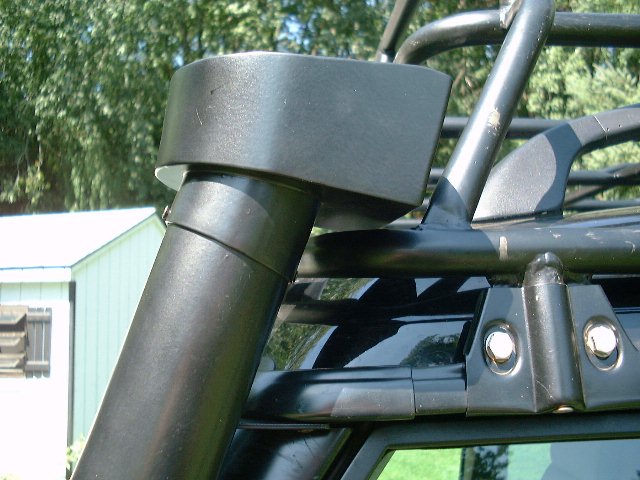
Attach the top of the snorkel pip to the underside of the roof gutter. I couldn't get the drill to go all the way through two layers of sheeting, because the roof rack was in the way. So I drilled through the lower layer from the bottom, and attached a shorter self-tapping screw. You might want to put a bit of silicone sealant at the gutter, to stop rusting if there is exposed steel, and to stop water pooring down from the hole.
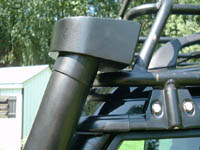
Last, attach the snorkel head facing backward, and drill two small holes in the inner pipe, using the head's holes as template. Attach with the black self-tapping screws provided.
The head CANNOT face forward (it can, but it would also have to face upward significantly).
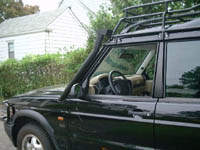
Close-ups: