RoverTym Suspension Install For a Discovery Series 1
by Tom Pearson
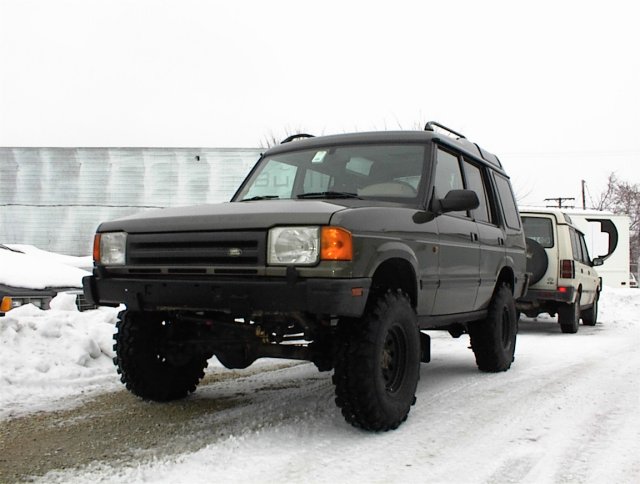
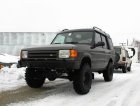
The following outlines the highlights from my install of the RoverTym Suspension on my totally stock 1997 Discovery SE. Many thanks goes out to AedoFab for the use of the garage, tools, & knowledge and to my other friends who did much of the work.
The following was installed:
RT Kit
- 3" Springs
- Rear Shock Mounts
- Rear Drop Cones
- Front Radius Arms
- Rear Trailing Links
- Rancho Shocks: 9005 Rear, 9207 Front
Other Stuff
- 15x7 American Racing Wheels from Gulf Coast Rovers
- 32x9.5R15 Super Swamper TSL's that I bought from AedoFab, a local 4x4 shop. (They are working on custom bumpers for the Disco I, so I will be installing those later when they are ready.)
- Rockware Dampener Relocation Kit
- LR Genuine D-90 Steering Dampener
References
To perform the install, we made reference to the Haynes Manual for a Discovery a bit, but mainly just relied on eyeballing what was currently there and utilizing Kyle Van Tassel's description of a spring and shock install (also on this site). Since the basic parts of spring and shock install have been so well documented already, I won't go into that much. However, I'll be sure to include all the "lessons learned" during the install of this kit.
Starting Data and RT Parts Kit Information
- Stock Measurements: Everybody loves to know the before and after, so I measured my saggin' rig from the center of the wheel to the lip of the fender at each wheel well. The left (drivers) side was about 18.5", and the right was about 17.5". I definitely had the "Disco Lean" going on before starting.
- RT Spring Measurements: The fronts chimed in at 18" each, and the rears were 17"
- RT Parts Pics:
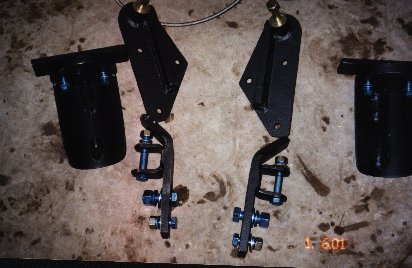
| Rear Suspension Mounts
and Cones: The cones and top shock mounts bolt right into
existing holes. The lower shock mounts (bottom of pic) are bolt on as well, but you have to remove some metal and drill an extra hole (more on this later). |
 |
| |
| Rear Trailing Links:
The rear trailing links simply bolt in where you remove the old
ones. Notice the silver metal bushings on the end. You use
a different amount of these based upon the size of your lift.
With the 3" lift, RoverTym recommends using all but the smallest spacer for the 3 inch lift. However, be sure to check with them for you particular application, as modifications to the trailing link lengths through the use of spacers change the angle of your rear pinion. If it is not set up correctly, you can have vibration problems. |
 |
| |
| Front Radius Arms:
The front radius arms are bent and reinforced compared to the stock
ones. Again, these are simply a replacement of the old
ones. Take the old ones out, pop the new ones on. I highly
suggest removing the rear link for this operation, as it makes
the operation go faster if you get it out of the way. You also
see a stainless steel brake line in the picture. For this application you only
need to do the rear brake lines, but what the heck, while you're
at it why not do all four and keep the original fronts for spares? |
 |
| |
| Springs: The RT springs come to you
labeled front and rear. Just in case the don't for you, the fronts are the longer ones. There is a vicious rumor floating around that the springs actually have a pre-determined top and bottom mounting position, but there isn't. (Verified this with John at RoverTym) |
 |
Now, on with the install!
Luckily for me, I had some really knowledgeable friends and a great shop to do
the install at. Due to this, the install only took about 7 hours including
a lunch break. Some basic tips:
RT Kit
- Spray all the nuts and bolts you can with penetrating oil the night before
- Take time to read the spring and shock install documentation on Discoweb.org and in the Haynes or Rover manuals.
- Do the front or back of the truck first, and do a side at a time. That way, if you get totally lost you can always look at how the intact side is together for reference. The following covers going back to front.
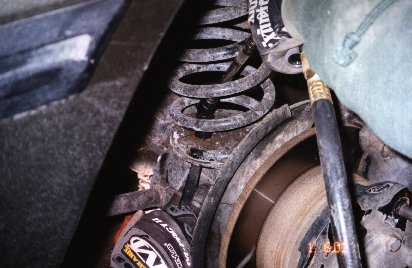
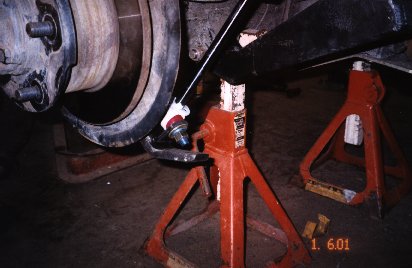
Step 1: Rear Springs
and Shocks (The bolt-off/on portion) Like
I said, there are other good write ups on this, so I won't rewrite it
here. Follow those and you should be fine. Take note on the order of the steps when the rear links and radius arms are involved. We didn't have to use a spring compressor once since we
removed the shocks, links, and sway bars before messing with the springs:
- Remove the stock spring mounts.
As you can see, the right tools make this go smoothly. This is the part that most folks
bitch about on Discos due to the locations of the nuts/bolts. If you have access to air tools and angled sockets, this is not very difficult. (The front was equally easy using this method).
- Remove the stock shock mounts.
- Remove the rear trailing link.
- Either jack up or have somebody apply pressure to the other side of the truck to flex the axle. That way, you can just pull the spring out with a little muscle.
- Put on top shock mount, cones and new
springs, using the axle flex method to get the spring back on.
- Attach rear trailing link..
|
| Spring mount
removal:
|
| New rear trailing
link being put on:

|
| A shot of the
other end of the trailing link with all the bushings installed. Be
sure to put the bushings on the side of the mount facing the rear.
Otherwise, you're not gonna do any good!

|
| Step 2:
Rear Shock Mounts - The not so "bolt on/off" stuff:
In order to fit the lower shock mounts, you can mount them on the top or
bottom of the existing shock mount according to RT. To do this, you will have to grind off one of the cups that used to hold the stock shock bushings as well as drill a hole
for the second bolt on the shock mount. |
| Grinding off the
cup

|
| Drilling the
second hole
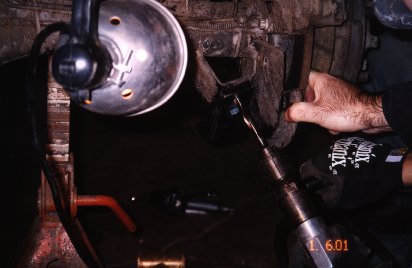
|
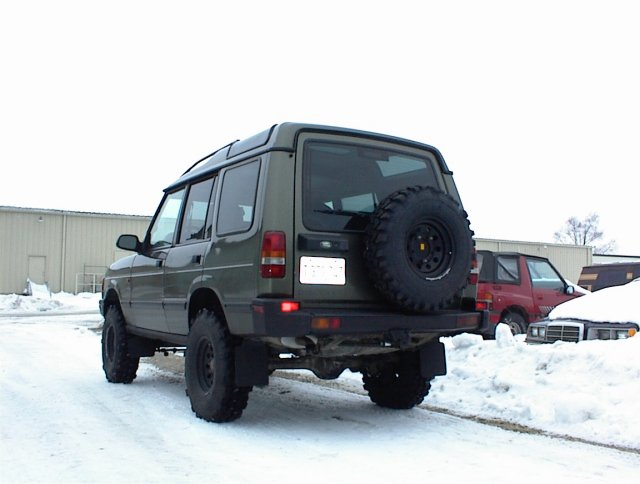
| Step 3:
Finishing off the rear: Once the rear links, springs, and
shock mounts are on, the final thing to do is mount the Rachos and then
revel in your success. Here's some shots of the completed rear
setup. You supposedly can mount the shocks either end up, but I
choose to do it this way because it's easier to reach the adjustment
knob. |
 |
 |
| Step 4:
Do the front! Yeah, just one step right?
Unfortunately, in all the excitement and hub-bub and didn't take many
shots of the front going in. Fortunately, this is covered
elsewhere. Tips from me are to mount the Rancho adjustable knobs
facing the front of the truck so you can reach in under the bumper to
adjust them. Of course, it doesn't matter if you get the in-cab
adjustment kit. Be sure to remove the drag link before messing
with the radius arms or you will just be cursing yourself for not doing
it. Also, since I don't have any bumpers and a stock drive shaft,
the front sway bar can no longer be used! It rubs the drive
shaft. I looking into solutions for this problem & I will post some pics when it's alleviated |
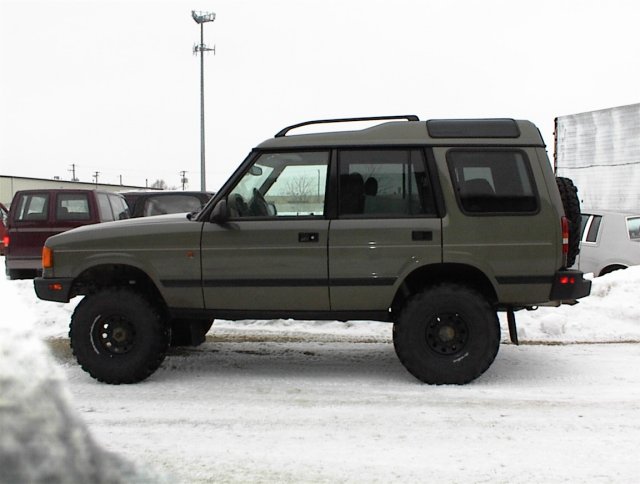
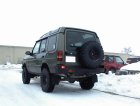
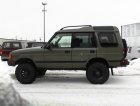
The Finished Product
I have to say that I really like the RoverTym components. Everything is built really stout and is up to taking a beating. The ride after the install is better than it was stock, and the 3" lift, in my opion, wears really well on a Discovery. Also, John was really helpful in answering all of my questions, even with regard to rims, tires, etc. It's always nice to get advice from somebody who's done it before, even better when it is the actual designer of the components himself.

Frequently Asked Questions
- Has your turning radius diminished? No, actually it has really improved. The 15x7
Wheels have a 4.25" backspacing. Stock LR alloys are 5.375". What this equates to are the wheels
being pushed over 1 inch away from the body making for a tighter turning cirle.
- Did you have any driveshaft vibration? Yes, in my case, the front driveshaft needs
replacement. This may be due to the fact that my actual lift is 3.5 - 4" since I don't have
bumpers or a winch. The rear driveshaft is fine, but I also have the RT trailing links with bushings
installed, which gives them more length. Don't know if that is directly related to it not vibrating, but it doesn't.
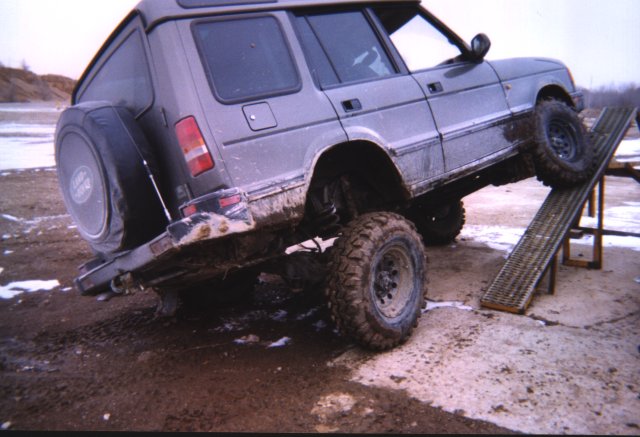
- How does it flex?
The truck flexes like mad. I had it up on a forklift this weekend. and the front wheel was 25" off the ground and the rear was 26". The action photos on the
RoverTym site are true to form. I will be posting my flex pics in a week or so.
- Can I fit 33's with this setup?
I have the 32" Swampers which are 32.3" inches tall. Some manufacturers would call that a 33". They also
have a 8.5" tread width and a 9.4" cross-section (sort of the "middle" of the sidewall when inflated.) A
wider tire would possibly cause you to trim all the way around the rear fender. A taller tire may cause
you to trim inside the rear wheel well above the mudflap, as that is where my tires are closest to rubbing. In my
opinion, you could fit them if you weren't afraid to just trim some more. The front seems to have plenty
of clearance. My flex pics will also show where I trimmed. The current pics were before trimming.
- How much trimming did you have to do?
I had to trim a bit more than I think most folks do off the back, but I still think it looks fine. There
was absolutely no rubbing inside the wheel wells, and I think this was because of the Gulf Coast Rovers
wheels and the backspacing. The same holds true for steering...no rubbing in the wells or on components. For the front,
I had to trim the front plastic bumper cap a bit and also the plastic side moulding behind the tire. No metal was trimmed.