Converting a Land Rover Discovery Series II SLS suspension to Coil Suspension (Model Year 99-04)
by Jess Alvarez
This write-up is intended to guide those that want to convert their stock SLS airbag suspension to a coil suspension, thus allowing them to install a taller coil lift on the rear of the vehicle. This is not intended to be a complete description on how to install a new suspension in your vehicle. Expedition Exchange has a really nice write up on their website for those who want to learn how to do it. You can find it at http://www.expeditionexchange.com/disco2frontcoils/ In their instructions, however, you will notice that they left the SLS airbags alone. Here's how to convert it.
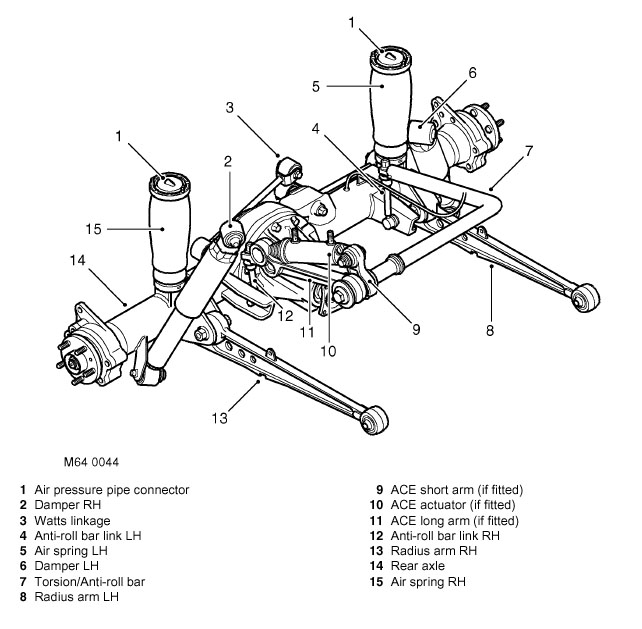
Below is a diagram of how the rear axle is put together with SLS. The air springs are the items labeled #5 and #15. These will be removed and replaced with coils
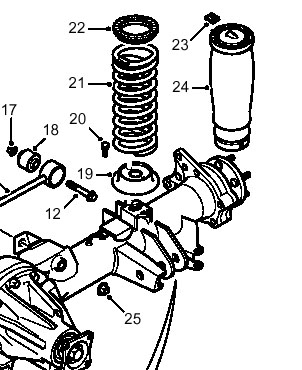
Since your vehicle is equipped with the air springs, it doesn't have some of the necessary parts you will need to get your coil springs to sit on your axle. Specifically, you will need to get two spring seats (one for each side) and the four bolts that hold them to the axle (two for each side), and also the spring seat isolators (two total) Below is a diagram that shows the spring seats and bolts. They are Items 19, 20, and 22. Purchase the spring seats that are made for the Discovery II only. DO NOT purchase Discovery I spring seats. They are shallower, and will not provide you a balanced lift front to rear on your Discovery II. Additionally, the springs have more of a chance of unseating with them. Use Discovery II parts to upgrade your Discovery II.
So, you have the parts you need, and are ready to start your modification. The modification we did for this write-up was on a 2003 Discovery II with SLS. The owner purchased Old Man Emu 762 Springs for the Rear and Old Man Emu 779 Springs for the front, along with Old Man Emu N107 Front Shocks and N108 Rear Shocks and Old Man Emu SD02 Steering Damper.
The first thing you need to do is get some proper chocks behind the front wheels. You will be jacking up your truck and the last thing you want it to do is come down on top of you. Then loosen the lugs on both rear wheels.
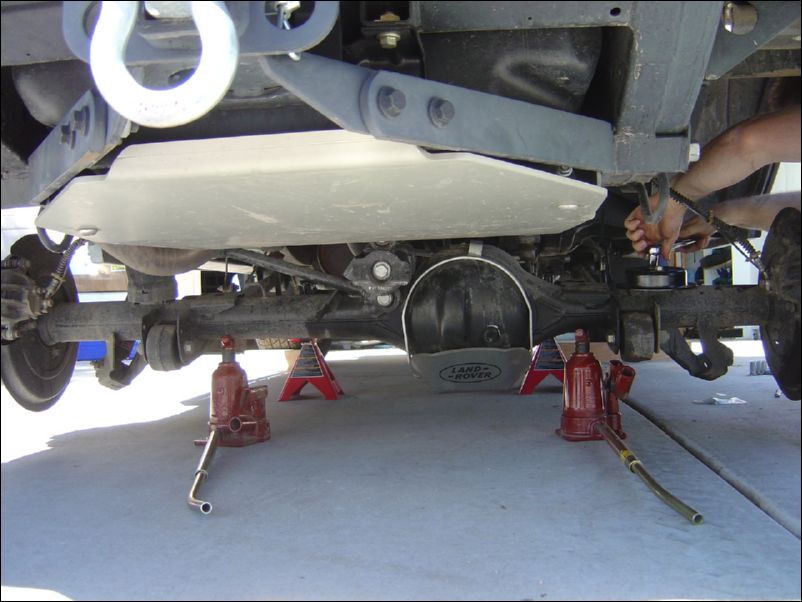
Jack the truck up using either bottle jacks on the axles or a hydraulic jack on the differential. Place jack stands on the frame, just inside of where the radius arms connect. This will allow the axle to drop out so you can work on the springs. (see below)
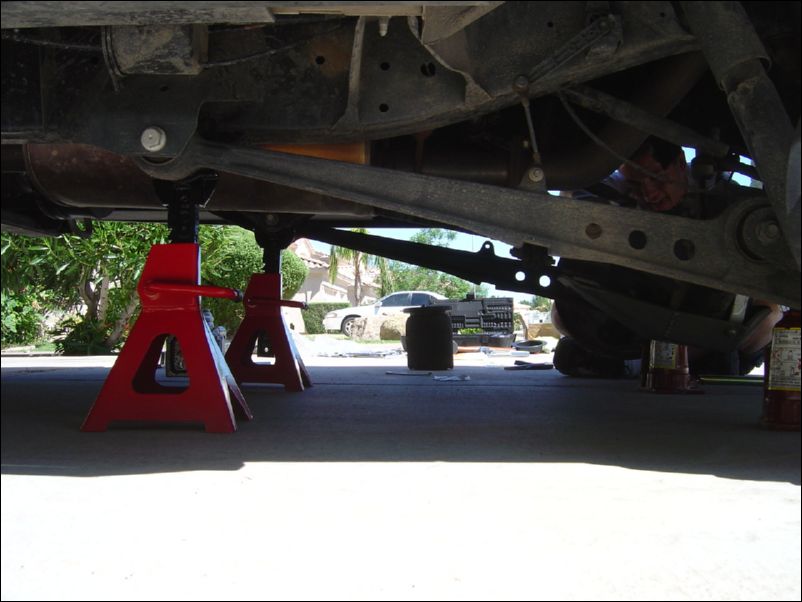
Next, being sure your jack stands are securely in place, remove the rear wheels. After they're off, you can drop the axle down as far as it will go to full articulation, be careful to make sure you don't over extend your brake lines when you drop the axle down. (which can be seen just to the right of the air spring in the picture below.
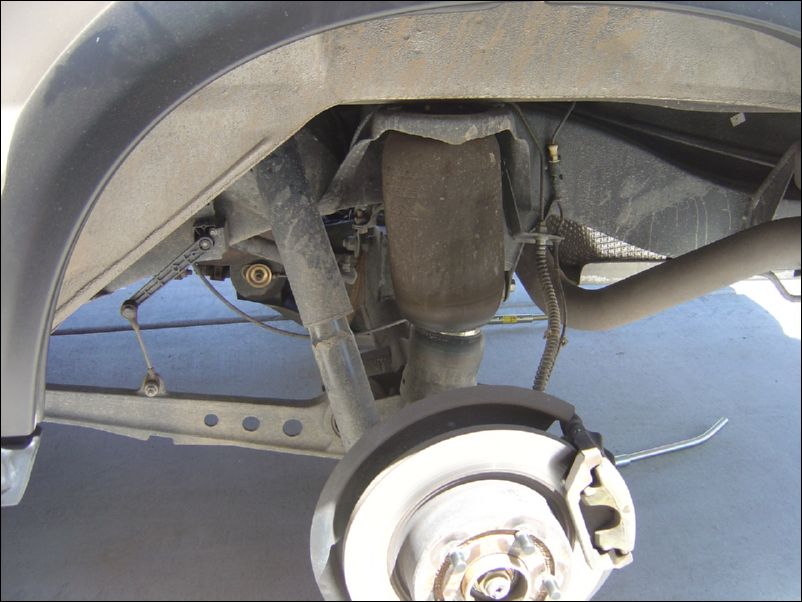
Now, locate the SLS air compressor box. It will be just below the drivers side door, and just under the truck. You can't miss it. Remove the two screws and cover to expose the compressor unit. Using a 10mm wrench, loosen the air hoses that inflate the SLS system. Specifically, remove the one closest to the driver side, and the one closest to the passenger side, leaving the center one alone. This will release pressure from the air springs, making it much easier to extract them from their current position. Leave detached for the time being.
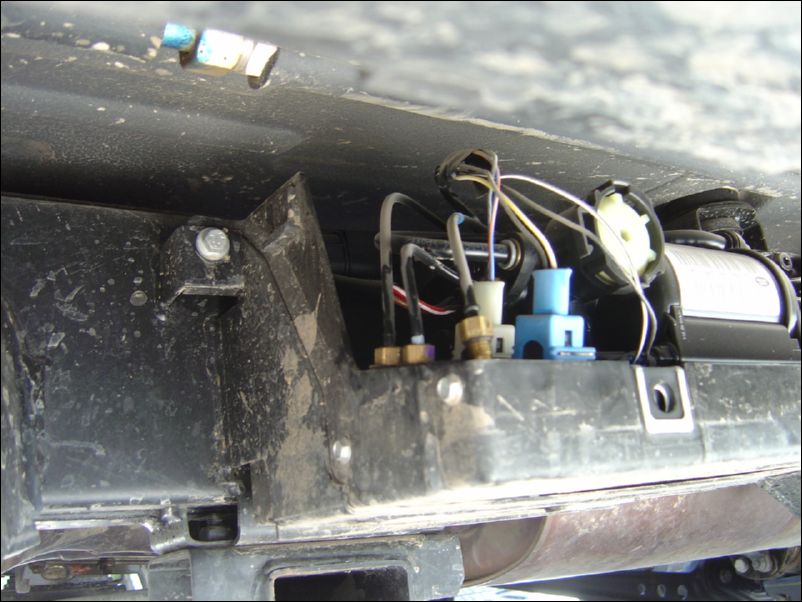
Now that the air springs are deflated, remove the small clips that hold the air spring to the top mount, and compress the air spring from the top, down, so that you can get your 10mm wrench to work on the air fitting on top of the air spring. After the hoses are removed, tape up the ends with electrical tape and zip-tie the hoses out of the way. You wont need them anymore, unless you intend to convert back to SLS in the future.
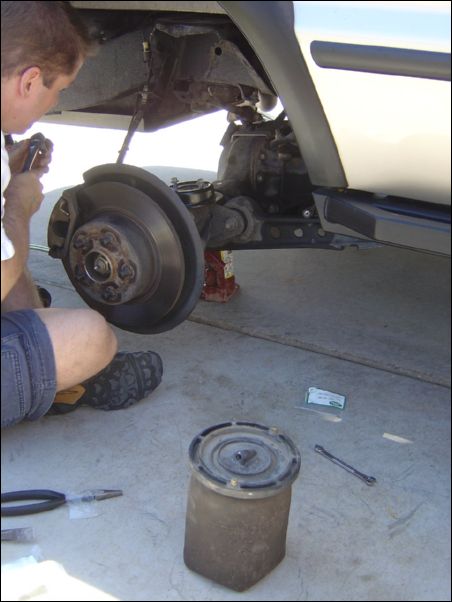
To remove the air spring, just give it a 90 degree turn, and it should lift right out. The picture below shows the air hose detached and the air spring removed completely from the vehicle. Now, you can install the Discovery II spring seat you purchased, as Clay is doing in the below picture.
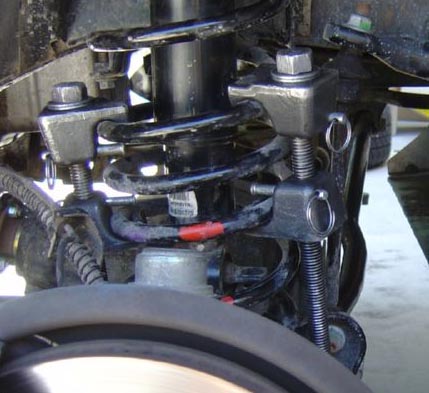
By now, you have removed your air springs, and installed the spring seats. The easy part is now done. For the next part, you're going to need a spring compressor. Any Checker or AutoZone will have them for use for free. You just need to go in, pay for it in full, and return it within 30 days for a full refund. Be sure to get the type that compress on the exterior of the spring, as below: Pictures are from a front suspension. Only shown to display spring compressors.
Now, get the compressor clamps set up and start cranking the spring down until it is small enough to fit into the spot where the air spring once was. This will take a little bit of work. A word of caution: When you are compressing these springs you are building up a lot of stored energy in the spring. Be very careful not to over tighten one side, or to do anything that might cause the spring to 'pop out' of the compressor clamps. NOTE: If you're more technically savvy, and feel comfortable temporarily removing the anti-sway bars, you may be able to drop the axle down far enough so that you don't need the spring compressor. I have never done it like this, but am told that it works. Again, though, make sure not to overextend your brake lines.
After the spring is compressed, place it in the spring seat, being sure to place it right side up, and jack the axle up so that the spring is actually sitting in the seat and resting against the top of the retainer. If you jack up the axle enough to compress the spring even further, it will make removal of the spring compressor a bit easier on you. Repeat for the other side.
Then replace the stock shocks with your old man Emu's. Removal and replacement of the rear shocks is very simple. All you have to do is unbolt them in two spots, and then refit your OME N108's in the same place.
Don't forget to refit the air hoses at the SLS compressor, and also refit the cover and screws.
Final Note: Since you no longer have SLS air springs, your SLS system will need to be turned off at the dealership with their Testbook software.