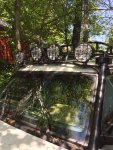
Washington's governor extended the stay at home order for another month so my thoughts are turning to my piles of spare parts in the garage. I recently put a Voyager XD full-length roof rack on my D1 and it came with 4 Hella Rallye 3000 halogen 55-watt lights. I already have a pair of factory Safari 5000 lights on my brush guard so I thought I didn't need more lighting. Seeing as they aren't doing anything in my garage and I need a new problem to occupy me, I'd like to install them.
There are some threads on this topic in the Discoweb archives, such as this one as well as the wiring diagrams in the old tech section. This write-up details another approach, but I don't think I want to replicate all aspects of it. I wired up my Safari 5000 lights with some help from a friend who's an electrical engineer but before I ask for his assistance again I want to make a plan and find the right parts.
Requirements:
I want to be able to operate the roof lights independently of the headlights, I want a quick disconnect close to the lamps so I can remove the roof rack easily when needed, I want all 4 lights to operate from a single switch, and I want a clean finished installation.
Planning questions:
The two most obvious choices seem to be
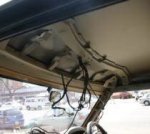
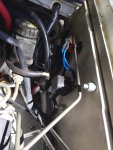
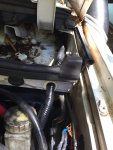
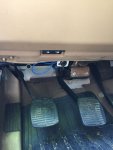
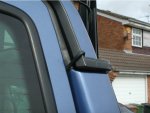
Interior: This being the XD low-profile rack, I removed the factory roof rails and filled the holes in the roof with the recommended Steele Rubber grommets. I could drill a hole in one grommet (presumably driver's side) and run the wiring under the headliner, down the inside of the A-pillar trim panel, and behind the dash through the same firewall grommet I used for the Safari 5000 lights. This would keep most of the wiring out of sight, but then I'd always have a section of wiring sticking out through my roof when I disconnected the lights and removed the roof rack. Which won't be often.
Discussion question: what are the pros and cons of each approach? What have you done and what works well/doesn't work well? Please post photos if you have them.
Setting up the switch
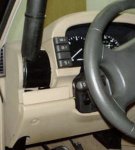
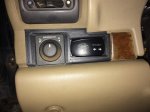
I wired my Safari 5000 lights to a spare latching factory fog lamp switch that I installed in the blank slot next to the original fog light switch. I have been happy with this setup. One option would be to remove the cruise control switch (I never use it) and use that slot for the roof lights, installing another spare fog light switch in its place (or just re-using the cruise control switch). I'm leaning towards this, but if anyone has a better idea I'm open to suggestions. How do I set up the wiring so the single switch operates all 4 lights?
Parts needed
Here's a photo of a light with the connections.
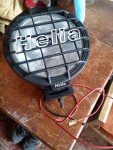
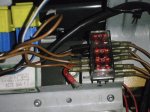
This is the wiring kit I bought for my Safari 5000 lights. Any reason that this wouldn't work for the Rallye 3000 lights? Same wattage, I believe. I would need a pair of these kits. Is there a better kit I should consider?
Finally, if I wanted to also add a rear work light at the same time, what would be a good option and what is the best way to wire that up? I don't like the routing through the cargo door opening, it seems inelegant. Maybe this is a project for another time.
There are some threads on this topic in the Discoweb archives, such as this one as well as the wiring diagrams in the old tech section. This write-up details another approach, but I don't think I want to replicate all aspects of it. I wired up my Safari 5000 lights with some help from a friend who's an electrical engineer but before I ask for his assistance again I want to make a plan and find the right parts.
Requirements:
I want to be able to operate the roof lights independently of the headlights, I want a quick disconnect close to the lamps so I can remove the roof rack easily when needed, I want all 4 lights to operate from a single switch, and I want a clean finished installation.
Planning questions:
- Where and how to route the wiring?
- Where and how to set up the switch?
- What parts do I need?
The two most obvious choices seem to be
- Along the exterior of the A-pillar
- Along the interior of the A-pillar
Interior: This being the XD low-profile rack, I removed the factory roof rails and filled the holes in the roof with the recommended Steele Rubber grommets. I could drill a hole in one grommet (presumably driver's side) and run the wiring under the headliner, down the inside of the A-pillar trim panel, and behind the dash through the same firewall grommet I used for the Safari 5000 lights. This would keep most of the wiring out of sight, but then I'd always have a section of wiring sticking out through my roof when I disconnected the lights and removed the roof rack. Which won't be often.
Discussion question: what are the pros and cons of each approach? What have you done and what works well/doesn't work well? Please post photos if you have them.
Setting up the switch
I wired my Safari 5000 lights to a spare latching factory fog lamp switch that I installed in the blank slot next to the original fog light switch. I have been happy with this setup. One option would be to remove the cruise control switch (I never use it) and use that slot for the roof lights, installing another spare fog light switch in its place (or just re-using the cruise control switch). I'm leaning towards this, but if anyone has a better idea I'm open to suggestions. How do I set up the wiring so the single switch operates all 4 lights?
Parts needed
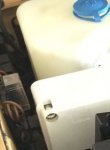
Here's a photo of a light with the connections.

This is the wiring kit I bought for my Safari 5000 lights. Any reason that this wouldn't work for the Rallye 3000 lights? Same wattage, I believe. I would need a pair of these kits. Is there a better kit I should consider?
Finally, if I wanted to also add a rear work light at the same time, what would be a good option and what is the best way to wire that up? I don't like the routing through the cargo door opening, it seems inelegant. Maybe this is a project for another time.


