| Author |
Message |
    
Garrett #2
| | Posted on Tuesday, February 19, 2002 - 12:59 pm: | 


|
I know i saw a post with instructions on how to install the expanded steel into the rack!!!! Anyone know where it is on the Dweb?????? |
Ho Chung (Ho)
| | Posted on Tuesday, February 19, 2002 - 01:21 pm: |
|
http://www.discoweb.org/rackflooring/index.htm |
Garrett #2
| | Posted on Tuesday, February 19, 2002 - 03:07 pm: |
|
Thanks Ho!! I had a rough weekend and for one reason or another I couldn't find the link!! |
Markd1x2 (Markd1x2)
| | Posted on Friday, February 22, 2002 - 07:53 pm: |
|
FYI
I paid $64 for a 4X8 sheet of heavy expanded metal (not sure of the guage).
I cut it to size myself (for my Atlantic British "safari" rack) and plan to paint it per the DiscoWeb intructions (paint roller, etc.)
I also bought some one inch angle iron but haven't decided if I really need it yet.
One thing I did to avoid getting cut much was to slit some old garden hose and tied it around the edge of the mesh sheet. I also did the fitting to the roof rack without removing the rack. I put some of the slit hose over the top edges of the rack and slide the mesh on-off-on-off..... without scratching the truck or rack.
Mark |
chrisvonc
| | Posted on Friday, February 22, 2002 - 08:06 pm: |
|
Mark, great idea with the garden hose. I had to remove mine for a few reasons. I dont have a level area to work on the trucks except for my car port and I could not stand on the rack to work on it. Also, I wanted to paint the bottom of the rack as well after the welding.
Send Ho pics when you get it done.
Chris |
Brandon Knotts
| | Posted on Friday, February 22, 2002 - 08:14 pm: |
|
Anybody know what a 4x8 sheet of the diamond plated aluminum should cost? I got one quote of $230 for 1/8 inch and $375 for 1/4 inch- is this reasonable? Seems fairly pricey to me. Don't know which thickness would be best.
Also, should I use three sections, or is there a good way to bend one sheet?
Thanks |
gp (Garrett)
| | Posted on Saturday, February 23, 2002 - 11:24 am: |
|
that seems a bit high. i can get a sheet (4'-6"X7') here in town for about $75. and that is 1/8" as well. i have the garvin rack. i will have the corners radiused as well to match the rack.
these are the same guys that are making my new bumper this coming week. so we shall see.
if you have plenty of support under the flooring the 1/8" will be sufficient. |
Markd1x2 (Markd1x2)
| | Posted on Saturday, February 23, 2002 - 10:27 pm: |
|
Instead of edging my rack floor mesh with angle iron I slit (lengthwise) some half-inch tubing using a metal cutoff blade. The tubing comes in 10 foot sections so I had to do some slicing. The metal cutting blade is exactly the right thickness to match the mesh material. The hardest part was cutting and bending the rounded corners.
Using the tubing gives a better permanent edging that the garden hose and also provides good support for the edges and corners and isn't as heavy as the 1 inch angle iron I originally planned to use. The end product will have a much lower profile than if I had used angle iron. I'll try to weigh it to see how much weight I'm actually adding to the rack.
The tubing was only $1.54 per 10 foot section...
so It looks like, even if I have some welding done, this project should cost less than $100 ... including the painting.
Mark |
Markd1x2 (Markd1x2)
| | Posted on Monday, February 25, 2002 - 04:19 pm: |
|
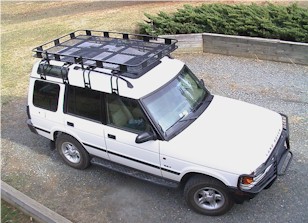
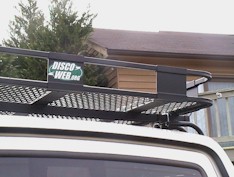
Here are the pics of my recently created 1/8 inch thick mesh floor for my roof rack. It added 40 pounds topside:
 |
Axel Haakonsen (Axel)
| | Posted on Monday, February 25, 2002 - 08:54 pm: |
|
Nice job, I like the sticker.....  |
E Snyder
| | Posted on Tuesday, February 26, 2002 - 10:16 pm: |
|
I've always thought the expanded metal is a better way to go than a solid sheet of anything. I had a sheet of plywood up there for a while, and seemed to get a lot of uplift at highway speed. Mark, good idea on the metal tubing. I used the angle iron trick, but I was going for strength as well as protection against cuts. Nice to see you at Lowe's the other day! Now if I can just get you out of the Lowe's parking lot and onto the trails...
:-)
Enoch Snyder |
Markd1x2 (Markd1x2)
| | Posted on Wednesday, February 27, 2002 - 09:45 pm: |
|
Enoch,
Yes, I saw your green D1 stored at Mike J's. I guess it was while you were in Guatemala.
I like what you did with the mud.
I & my truck will be in Arlington all next week. I tried to stay at one of the hotels in Roslyn but my truck's 7'6" won't fit in any of the underground garages.
Since I saw you at Lowe's I've had the diff protectors and OME shocks + springs installed.
Yeah, I want to get on the trail with you experts. I have straps and a hitch "ring" but ...
I still don't have proper front rings and I haven't had the nerve to carve on my front spoiler. Maybe you can show me places that I can go "as I am" so that I don't do involuntary carving and has less chance of needing extraction
Mark |
Markd1x2 (Markd1x2)
| | Posted on Sunday, March 03, 2002 - 12:27 am: |
|
Someone asked for closeups of my rack floor mod...
There isn't really much to add except that it did rattle a bit until I made a few mods to cushion and lift the mesh slightly away from the basket members.
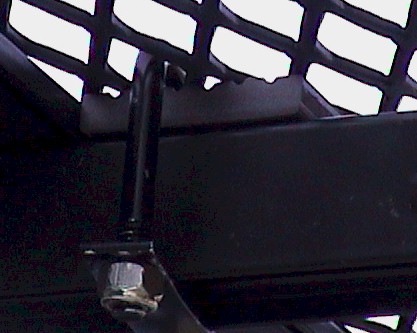
The small block prevents the u-clamps from depressing the mesh and keeps the mesh just slightly above the rack cross members.
The material is from a section of garage door trim that cost less than $8. I also placed some strips of door jam weather stripping to cushion the mess from the rack. Here is a pic showing the material and the tool i used to cut them
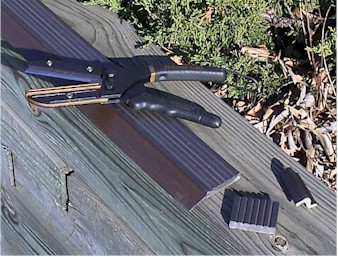
Here is a closeup of the tubing showing the upper half .
I inserted silicone between mesh and tubing to keep out moisture and to help fuse the mesh to the tubing without doing any welding.
The end result is that test runs down the roads that produced the most rattling now give a quiet ride and even high speed tests (70 mph) were made with the sunrooves open and there was less wind noise than without the roof flooring... and no rattle! |