
So this project started out as a simple job; replace the driver's side fuse box. That went well and took roughly 15 minutes start to finish. I could have hung up my hat and said to myself "job well done. We now have all electrical functions working properly again." That would have been great and I could have enjoyed the rest of my day.
But no.
15 minutes was clearly not enough time to fix the rover, so I went and fixed it some more.
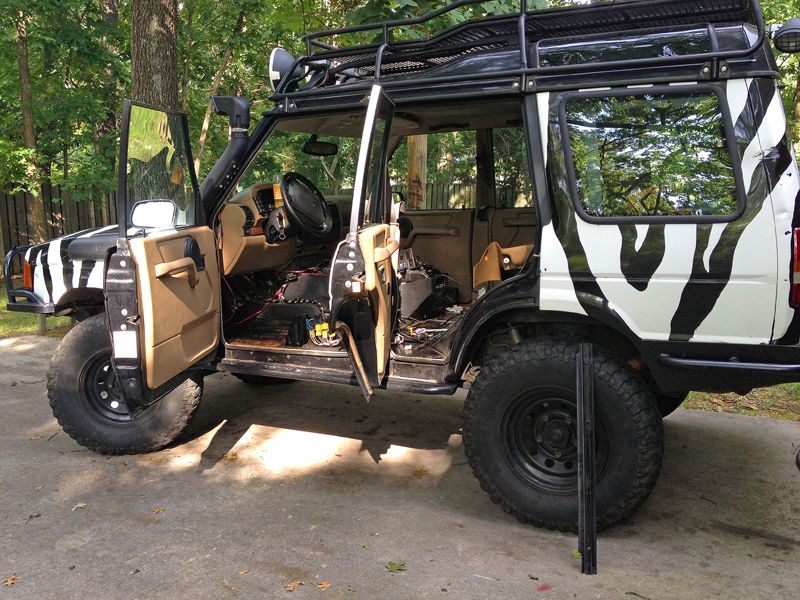
Now it looks like this:
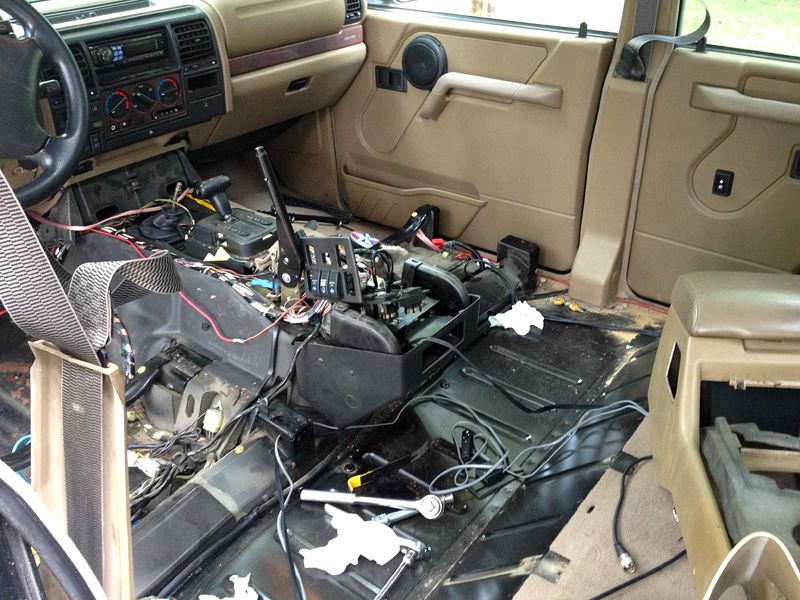
Actually it looks worse than that. There are even more bits removed.
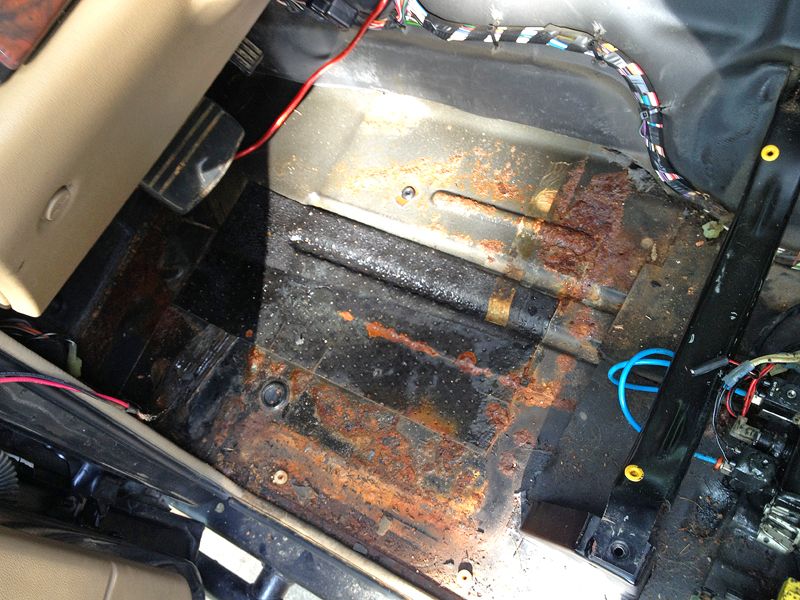
I knew my truck had been taking in water for some time and I had been putting off the inevitable in hopes that my ignorance would give me bliss, but upon removing carpeting and padding I came accross what every Land Rover owner fears... RUST :ack:
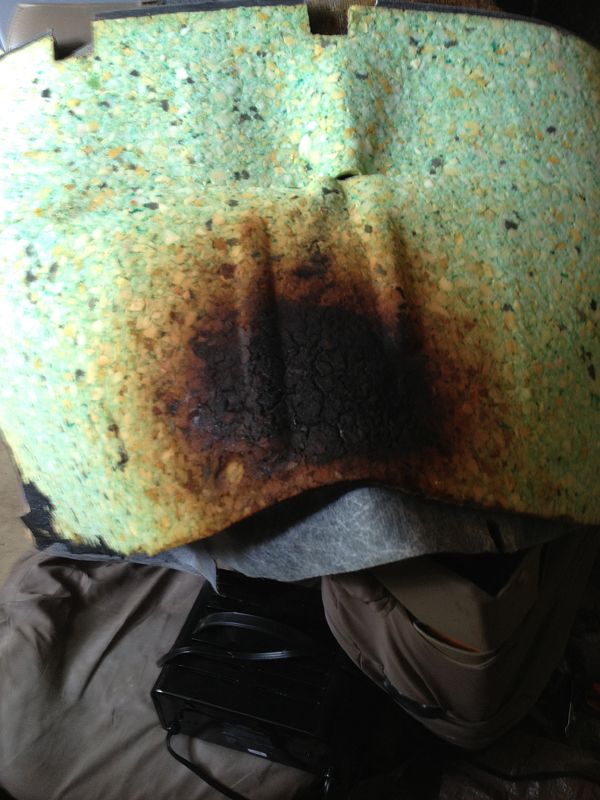
The rear floorboard is in perfect shape as you may have noticed in the photo above. However, it appears that my muffler is a bit too close to the body and now I know why "it smells like something is burning".
The driver's floor has some descent surface rust, but nothing all the way through and is easily fixable. I have poked and prodded and it is still very solid in the rough looking areas.
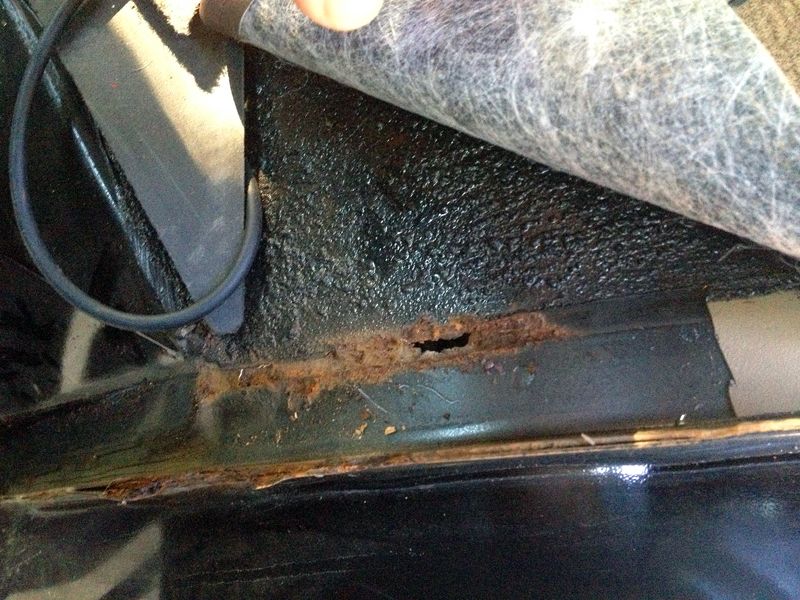
The passenger side was not so good. I scraped away all the top rust and made some pretty nice sized holes. I am pretty bummed about this, but again, I did half expect it.
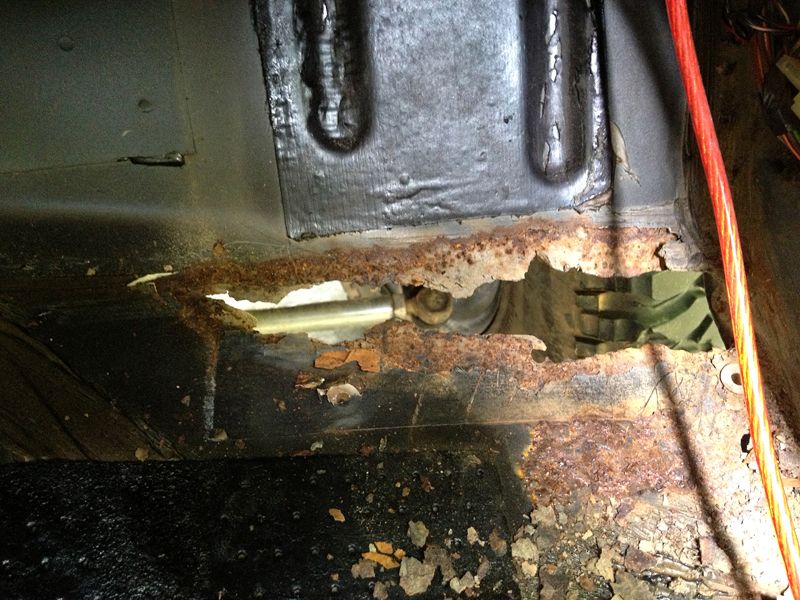
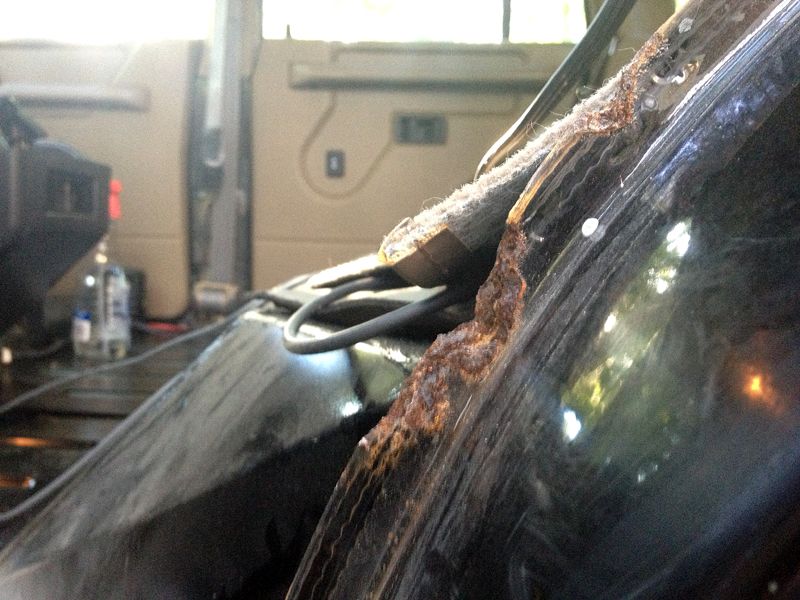
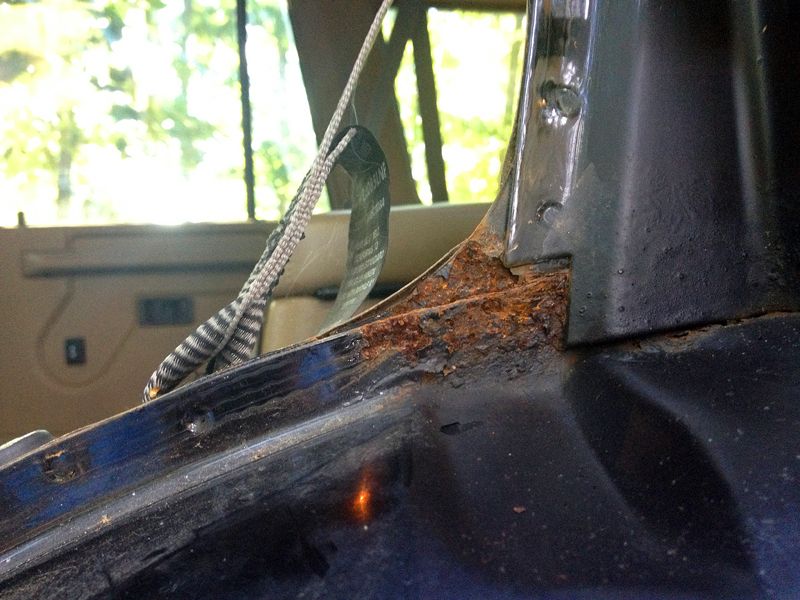
I then pulled all of the door edge/trim off and when I got to the rear driver's side I pulled some truck off with it. I was more upset about this rust than the floor boards.
I do not own a welder nor do I know how to weld very well, so now the truck must sit in this state until I can find someone local to me to take my truck to. I can refit the driver's seat and seatbelt, hook the parking brake back up and drive it to someone for the repair work.
So this is how she sits.. for now.
This is not really tech and I'm not really looking for solutions, just wanted to share.
Once the repair work is done I will bedline the floor pan (rear was done years ago and holding up great), dynamat then reinstall carpeting.
But no.
15 minutes was clearly not enough time to fix the rover, so I went and fixed it some more.
Now it looks like this:

Actually it looks worse than that. There are even more bits removed.
I knew my truck had been taking in water for some time and I had been putting off the inevitable in hopes that my ignorance would give me bliss, but upon removing carpeting and padding I came accross what every Land Rover owner fears... RUST :ack:
The rear floorboard is in perfect shape as you may have noticed in the photo above. However, it appears that my muffler is a bit too close to the body and now I know why "it smells like something is burning".

The driver's floor has some descent surface rust, but nothing all the way through and is easily fixable. I have poked and prodded and it is still very solid in the rough looking areas.

The passenger side was not so good. I scraped away all the top rust and made some pretty nice sized holes. I am pretty bummed about this, but again, I did half expect it.

I then pulled all of the door edge/trim off and when I got to the rear driver's side I pulled some truck off with it. I was more upset about this rust than the floor boards.


I do not own a welder nor do I know how to weld very well, so now the truck must sit in this state until I can find someone local to me to take my truck to. I can refit the driver's seat and seatbelt, hook the parking brake back up and drive it to someone for the repair work.
So this is how she sits.. for now.

This is not really tech and I'm not really looking for solutions, just wanted to share.
Once the repair work is done I will bedline the floor pan (rear was done years ago and holding up great), dynamat then reinstall carpeting.


