Lucky8’s Project Discovery 3

*NR*BRENT

Well-known member
Feb 24, 2009
119
0
MARYLAND
I know a guy who knows a guy who knows a guy that is wondering why people insist the 06+ lr3 is more reliable than a 05. only a few enhancment actualy took place between the model years... if you want to call a few wiring splices enhancments. my concern with lr3 reliablity is the CAN bus running through the park brake module and IP as the gateway module to the truck. Also the tccm being in a poor spot to take in some h2o. also it seems like alot of these high mileage lr3s are suffering from diff issues. the rear electronic diff itself is good... old software and low battery voltage is what lead to many early rear locking diff motor failures.
 
Jan 25, 2010
3,544
4
your moms bed
Mine had the rear diff actuator fault bullshit that fucks everything up. Changed the diff fluid and tapped the actuator with a hammer and all is well. I think it's like the d1 cdl linkage. You have to use it occasionally or it freezes up. Now I just need a ridiculously priced parking brake actuator. One good thing about the 05 compared to the 06, no stupid tpms to have to fuck with when you bump up the tire size.
 
Last edited:

jymmiejamz

Well-known member
Dec 5, 2004
6,008
361
35
Los Angeles, Ca
I know a guy who knows a guy who knows a guy that is wondering why people insist the 06+ lr3 is more reliable than a 05. only a few enhancment actualy took place between the model years... if you want to call a few wiring splices enhancments. my concern with lr3 reliablity is the CAN bus running through the park brake module and IP as the gateway module to the truck. Also the tccm being in a poor spot to take in some h2o. also it seems like alot of these high mileage lr3s are suffering from diff issues. the rear electronic diff itself is good... old software and low battery voltage is what lead to many early rear locking diff motor failures.

'06 is no better than '05, I just use '06+ as a broad statement because there were BMW powered Range Rovers and Freelanders in '05. The TCCM won't get wet if a battery cover is fitted. It also won't corrode if the proper battery is installed with the vent tube installed correctly. LR3's have had diff issues for a long time, but most got replaced under warranty. I've only actually seen one fail completely other than just making noise.
 

jymmiejamz

Well-known member
Dec 5, 2004
6,008
361
35
Los Angeles, Ca
Mine had the rear diff actuator fault bullshit that fucks everything up. Changed the diff fluid and tapped the actuator with a hammer and all is well. I think it's like the d1 cdl linkage. You have to use it occasionally or it freezes up. Now I just need a ridiculously priced parking brake actuator. One good thing about the 05 compared to the 06, no stupid tpms to have to fuck with when you bump up the tire size.

Why do you need a parking brake actuator?
 

jymmiejamz

Well-known member
Dec 5, 2004
6,008
361
35
Los Angeles, Ca
Mines is fucked. I wouldn't worry about it but the light on the dash but it's annoying me.

Shoot me a PM if you need any tips on replacing it. The most common failure of those I see is when someone improperly adjusts the parking brake causing the shoes to come apart and the excessive heat melts the cable.
 

jafir

Well-known member
May 4, 2011
1,628
0
Northwest Arkansas
It also won't corrode if the proper battery is installed with the vent tube installed correctly.

So my newest LR3 has an interstate battery in it, which I think I've read interstate is the current dealer replacement battery for them.... but I might be wrong. Even so, mine had the vent tube plugged in, but in typical interstate battery fashion, it leaks out of the battery posts. I've never seen an interstate battery that was more than a week old that didn't have nasty corrosion all around the battery posts.

I'm probably going to replace it with a diehard platinum if I can find one in the right size.
 
Part 1
Mucky Ducky

Sorry for the long delay in posts but trust me when I say we have been busy with the D3 and it has seen some serious action.


Before I explain this picture that has surfaced on a few forums of our secret organic A/C mod, let’s take a quick stop at the events that lead us to think the D3 was ready to fight the mighty trees of Virginia.


Our first stop on the Summer 2014 tour was The Wilds in Ohio. Chris Ray of Mud Ruts Repair Shop and the Green Oval Guild always put on a hell of a good show and this year was no exception. We showed up to 85 degrees and nothing but sun. As soon as the tent was up the clouds started to roll in and then it was quickly followed by torrential downpour.


What the hell, rain or no rain we were at The Wilds, America's largest nature preserve. So with a smile and some recovery gear we hit the trails. It did not take long though to figure out that we should have brought more recovery gear and we were running low on smiles. Have you ever heard the term "duck snot" used to describe mud?


Even in this mud I thought I would be fine. I mean, I had the Terrain Response set to Mud!! Made sense to me.


We even brought along a little old Series truck to help out


I started on a downhill that I have seamlessly handled in the past with a stock truck on banana peel tires. With both of my feet jammed hard on the brake pedal, my attempts to stop were still futile. The duck snot mud had other ideas about giving me an express route ride into rapidly approaching trees. Take a look at this and you can see we are not talking about a large or steep hill here.


Thankfully the D3 came to a stop just before this:


So I radioed for help from Andy and Rick in the little Series truck (on 37s) but he soon informed me that they too were immobilized about 200 feet behind me. After some tire-spinning fun and nearly digging a hole to China, Andy was able to position his bumper against a tree to provide an anchor point for the still sliding D3.


There unfortunately was no way that their Series that weighs as much as one of my pelican cases was going to be able to pull out the 6,000lb D3. And then, as if it were something out of one of those crazy Canadian beer commercials, Randy Williams from British Boneyard miraculously pops out of the woods. Together we were able to design a plan on how Randy was going to snatch block me from the bottom of the trail in an attempt to pull the nose over.


To avoid pulling the truck down the hill, we needed a good point of attachment on the side of the Lucky 8 D3 in order to line up with the trees we could also use as snatching points. Unfortunately the Rock Sliders did not have the tree bars (nerfs) to grab onto. We were only left with one option: Go through the rim of the truck as all we needed was a tiny little tug. **Full Disclosure – this is not an approved recovery point. I do not recommend or condone my actions, but in the interest of science we went for it.**


This is when things started to get interesting. Instead of being able to pull the nose of the D3 over, Randy started pulling himself up the hill. This was a complete WTF moment. With the D3 being tide off to the Series Monster Truck jammed against a tree Randy’s D2 did not have enough weight to get the job done either. It was time for another plan.


With the traction being so unstable, we decided to take advantage of the duck snot factor. Have a look at this video.

https://www.youtube.com/watch?v=AT-4Ti9qfT8

(cue the trumpets) SOFT SHACKLE TO THE RESCUE!!!!!

By spinning the tires, it made the front end lighter so to speak and easier to winch over and position the D3 back onto the trail. You may think this muddy tale is over. It isn’t.


The BAD

Somerwere on this little green lane mishap tour the rear sway bar link had snapped. Normally this would not be an issue but the the link broke in such a fashion that the lower rod section was able to make contact with the height sensor. A broken hight sensor can give you a warning light or worse. As you would imagine the L8 D3 went with worse.

The Good

We were able to find a slightly longer and slightly beefier swaybar link to put in the rear of the D3


The ugly.

Here is this updates poser pic. But let me explain this humiliating picture and let it be a learning tool. If you have a height sensor that is out of adjustment or is not reading in the proper fashion, you will get a suspension fault. I can hear the voices now. "Thank you Professor Obvious, we already know that." What you guys may or may not know is that if your truck has been sent to the bump stops with lift rods, there is a good chance that the rods have pushed the sensor out of the range it is capable of reading. A fast trail fix is to lift the truck up front and rear at the same time. By doing this it will allow the hight sensor to go back into a position where the computer can read the values again.


fishEH

Well-known member
Jan 26, 2009
6,929
203
Lake Villa, IL
Sounds like the D3 needs a winch. ;)
The Wilds is fun when its dry but can be a real nightmare when wet. The time I was there it did the same thing, torrential downpour. The camp was a disaster and the trails were impossible. That kind of wheeling gets old fast.
 
Part 2: I’m Seeing Red.

After the trip to The Wilds one thing was apparent: This truck desperately needs a winch.


There are only a few options when it comes to mounting a winch to the front of a Disco 3.

1) That ridiculous contraption that Land Rover sells

2) Steel Winch Bumper

3) Hidden Winch Mount

At the time, I was not happy with any of the available bumpers on the market. Quite frankly, they stick out too far. The LR3 has a fantastic approach angle so why would you add 10” to it and take away such a great asset? That point being made, the choice was simple.

Hidden Winch Mount.


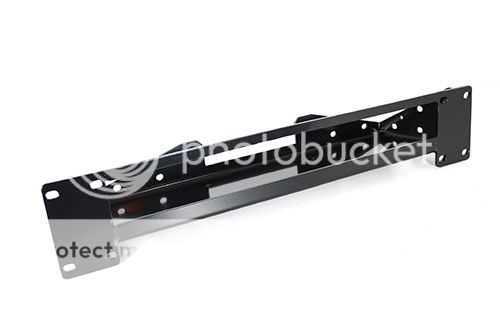
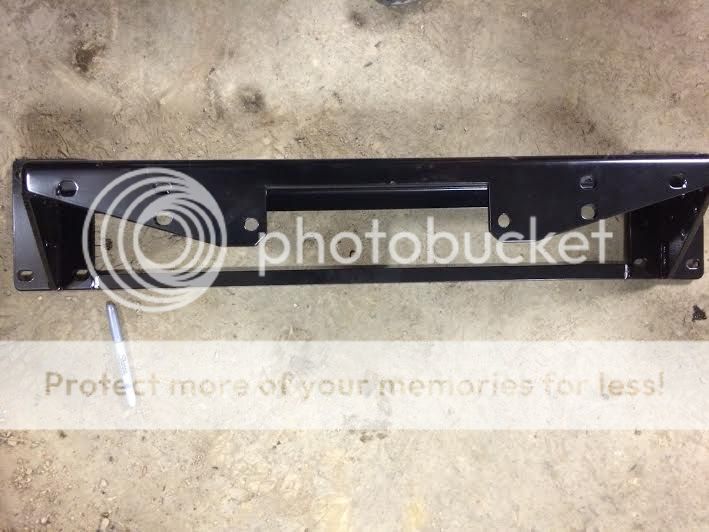
I chose to go with the Terrafirma Hidden Winch Tray for several reasons. First, their tray comes standard with oversized mounting hardware along with reinforced brackets that attach the tray to the frame. Second, with the TF tray, you can fit a plethora of winches to it. Third being the excellent price point it is offered at pretty much helped concrete the decision.

Of course going with the hidden design has its cons as well.

Where do you put the solenoid box if it is not integrated? Yes, you can extend the wires and move the box into the engine bay which isn’t a big deal, but it does add to the job. If the solenoid pack is integrated, then you will need to cut a hole big enough to put your hand through to plug in the controller.
How do you get it to free-spool? This is the worst part of any hidden winch tray. You can power the line out, but that takes forever, and if you’re taking on water then you don’t have time for that. You can clock the lever and get it into the best position, but you will still have to cut the bumper to allow for handle actuation.


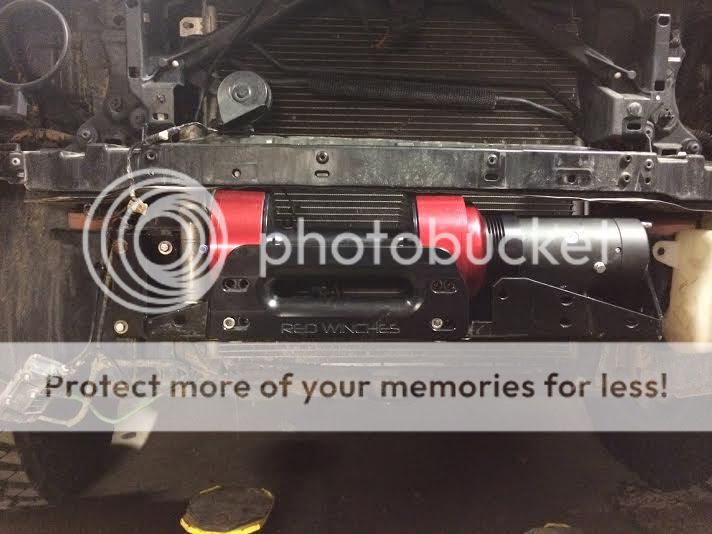
I wanted to avoid the entire free-spool issue altogether, so I went with this bad boy.
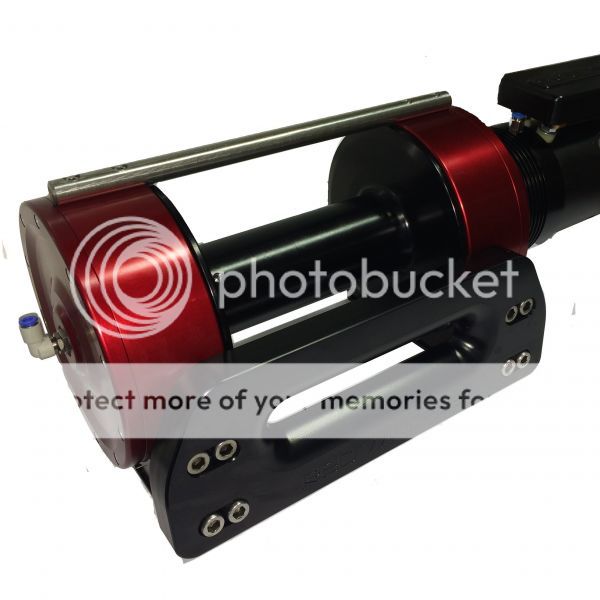


The Viper!

If you don’t know about these winches, please indulge me as I get on my soapbox and bend your ear for a minute.

Red Winch is quickly becoming the #1 name in Winch Challenge Events. If that’s not badass enough for you, these winches are also starting to pop-up on rigs being driven in the King of Hammers. It is understandable that you would not normally see a Red Winch on this caliber of truck, but our goal was to stuff one into the nose of an LR3 anyways.

The Viper, like all competition spec Red Winches, is CNC machined from aerospace aluminum. Even with its monster motor, it still weighs less than most 9k winches on the market today. Even with its lightweight body, the 71-pound Viper will still pull 100’ of line in just 55 seconds. For a reference point, the 89-pound Warn 9.5cti (which is a fantastic winch as well) pulls 47’ of line in 60 seconds. By my basic calculations, and I’m no mathematician, that is almost twice as fast. These features coupled with Red Winch’s military background make the Viper a tiny red Hulk!


All of those eye-popping features are great, but it is the air free-spool and brake system that I was most excited about. The air free-spool and brake system on the Viper have something that was previously unavailable on a winch of this size: To free-spool out, simply hit the switch.


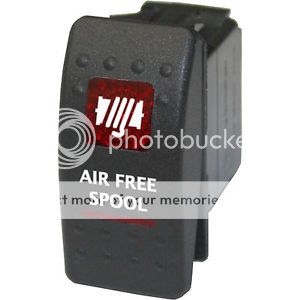
Yep, that’s it. No need to jam your hand in a hole to move a lever. The brake system is also a real nice feature worth noting. What it does is stop the winch as soon as you let off the button. For example, if you are winching up a hill and start going off course, you let off the switch and you simply stop where you are. There is no run off or rolling backwards. It is amazing.

Now you know why I wanted to go with the Red Winch. But by now I’m sure you’re more interested in “the how”. The plan was simple: stuff this monster into the front of the Project LR3 and as Ron Burgundy would say “keep it classy”.


Here is how I did it. You can decide if it receives Ron’s stamp of approval or not.

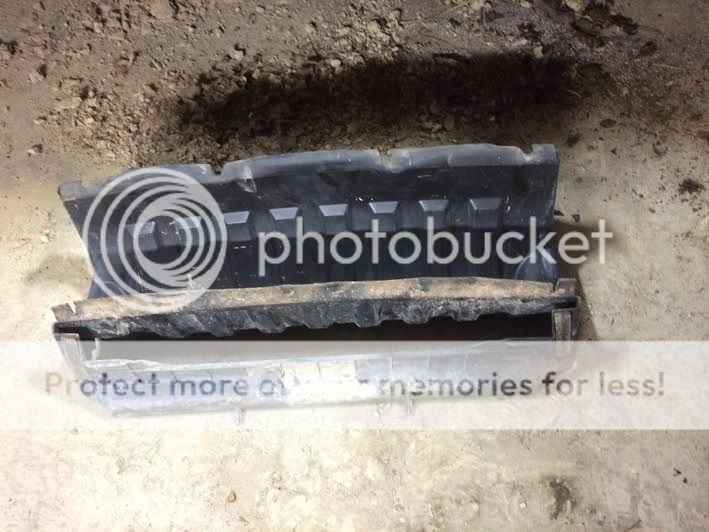
Step 1 – Remove the lower protection plate and admire the buildup of mud from adventures past.


Step 2 – Remove grill, headlights and bumper cover.


Step 3 – Pull the air deflector out. The one bolt next to the radiator is a real PITA.


Step 4 – Do the NAS mod. The NAS V8 trucks have a condenser that interferes with the tray. It is a common issue with any hidden tray that we have ever come across. The first thing you need to do is remove the upper cross bar. I do not know why it is there.


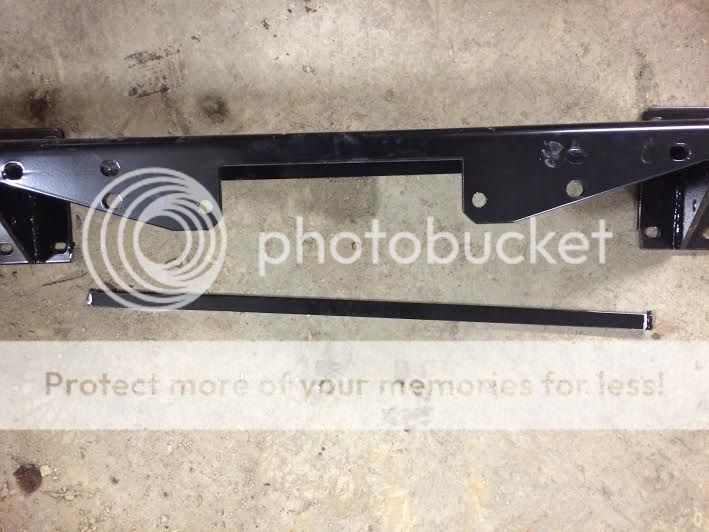
Next, you need a simple notch for the condenser.


Test fit your cut out. I like to file down the edges to smooth and the hit the cutout with a shot of spray paint or cold galvanizing paint.


Step 5 – If you are putting in a standard winch, all you need to do is drop it in and wire it up.


The Viper is longer and thus offset due to the large motor, but it is not much taller than a standard size winch. This was an easy fix. All we needed to do was expand the fairlead opening on the front of the tray.


The upper tie-bar sticks off the top of the winch about a 1/2".


That ½” is just about all I needed to get the Viper to fit. To get the extra room needed, I simply removed the lower portion of the tiny upper-bumper cover support with a grinder. I have a sneaking suspicion that this truck is going to see Mr. Grinder again in the future.


Step 6 – With everything in place, the next thing to do is cut out the fairlead hole in the bumper cover.


Step 7 – Install the fairlead.


[/URL]